How to DIY bleach and dye your hair
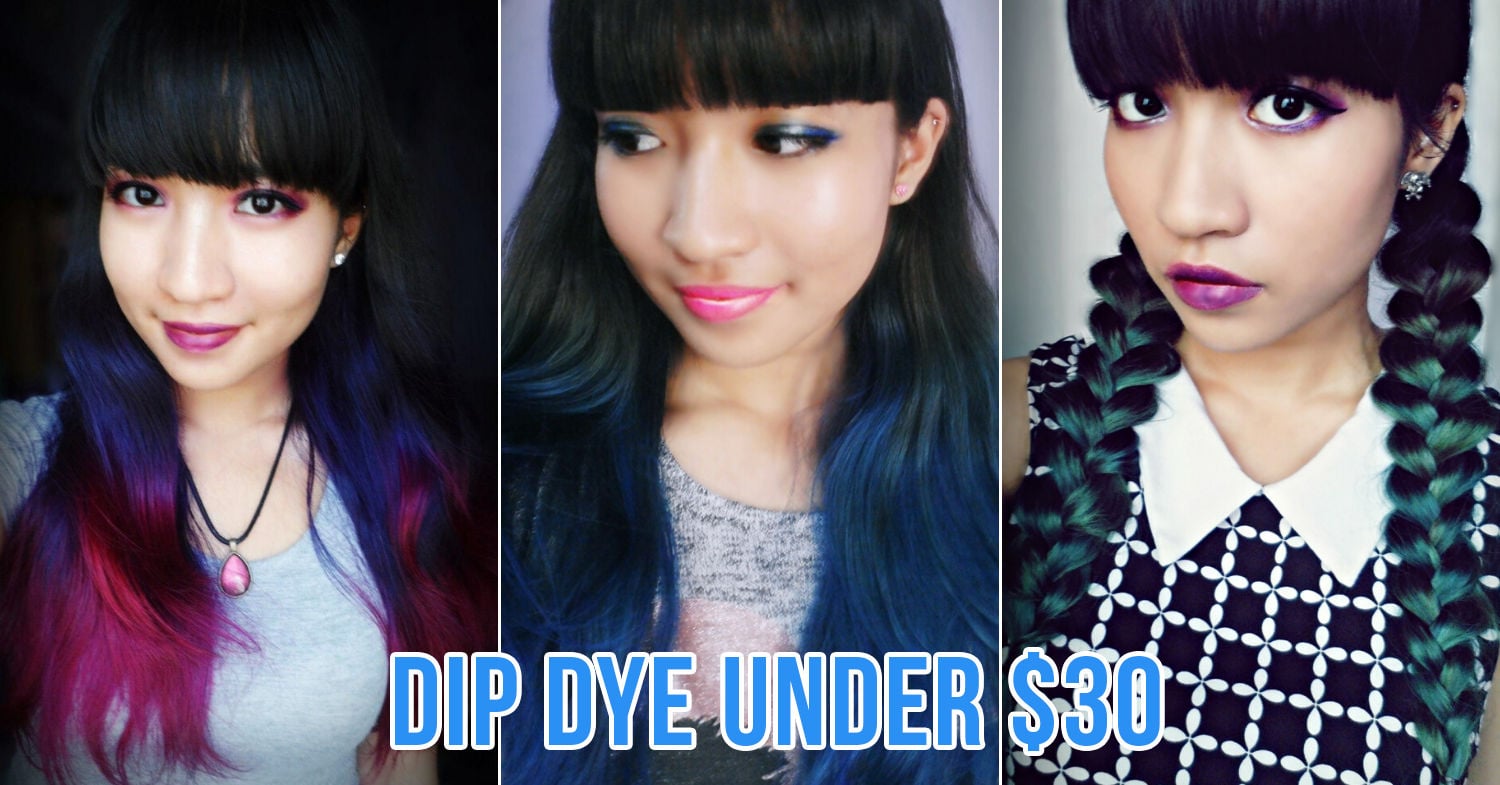
Hair dye and bleach in Singapore
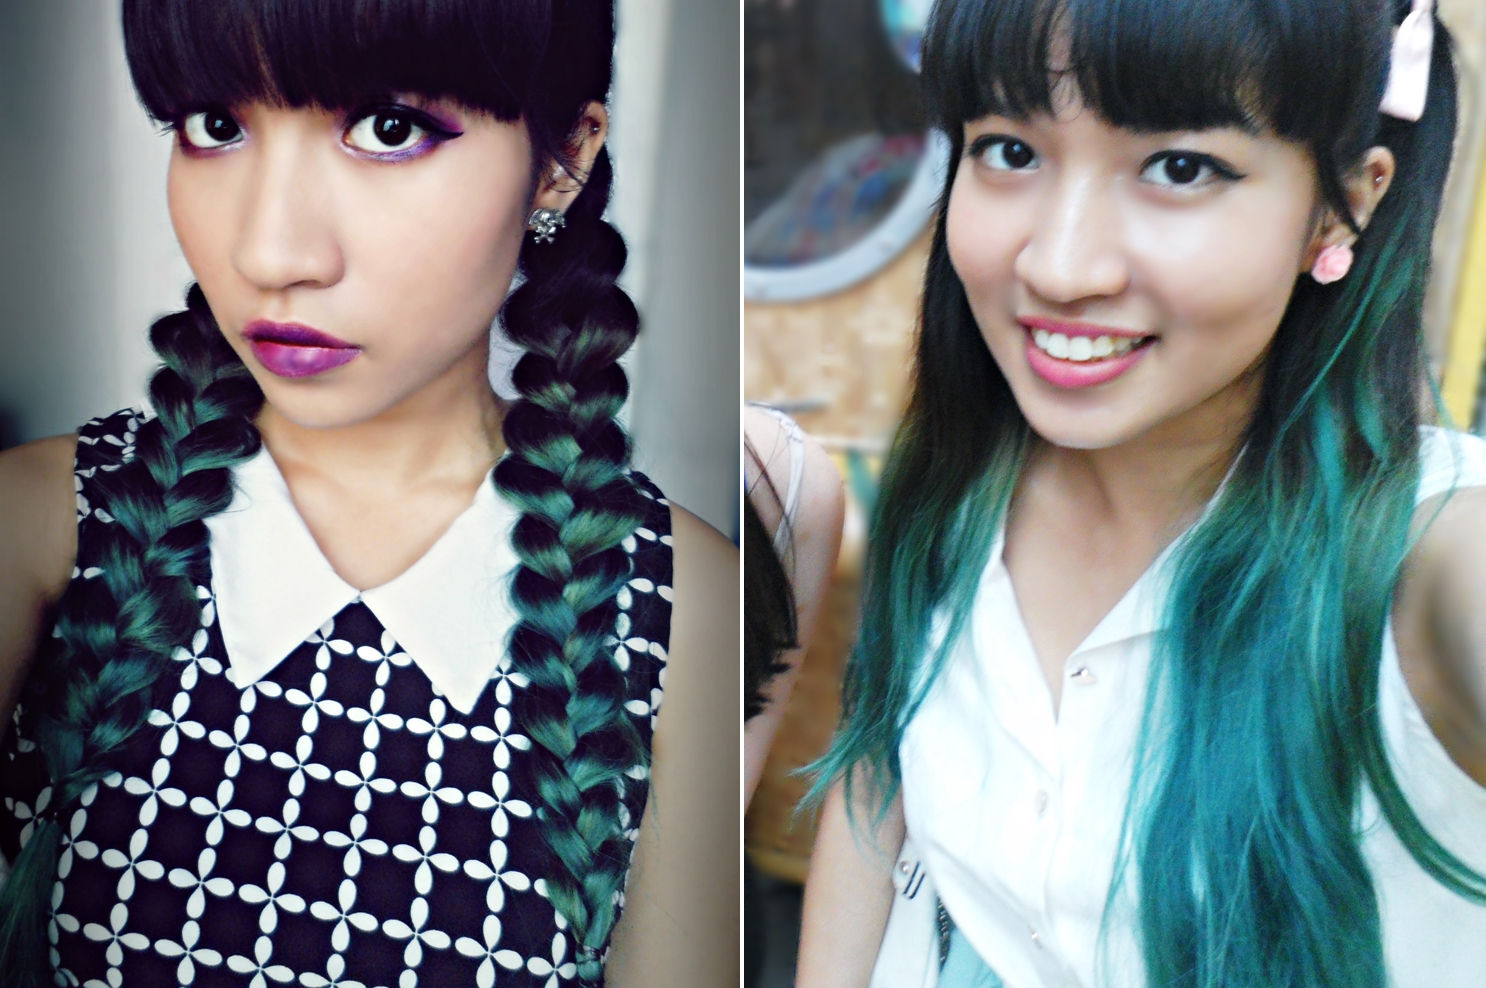
Image adapted from: @caramellechaos
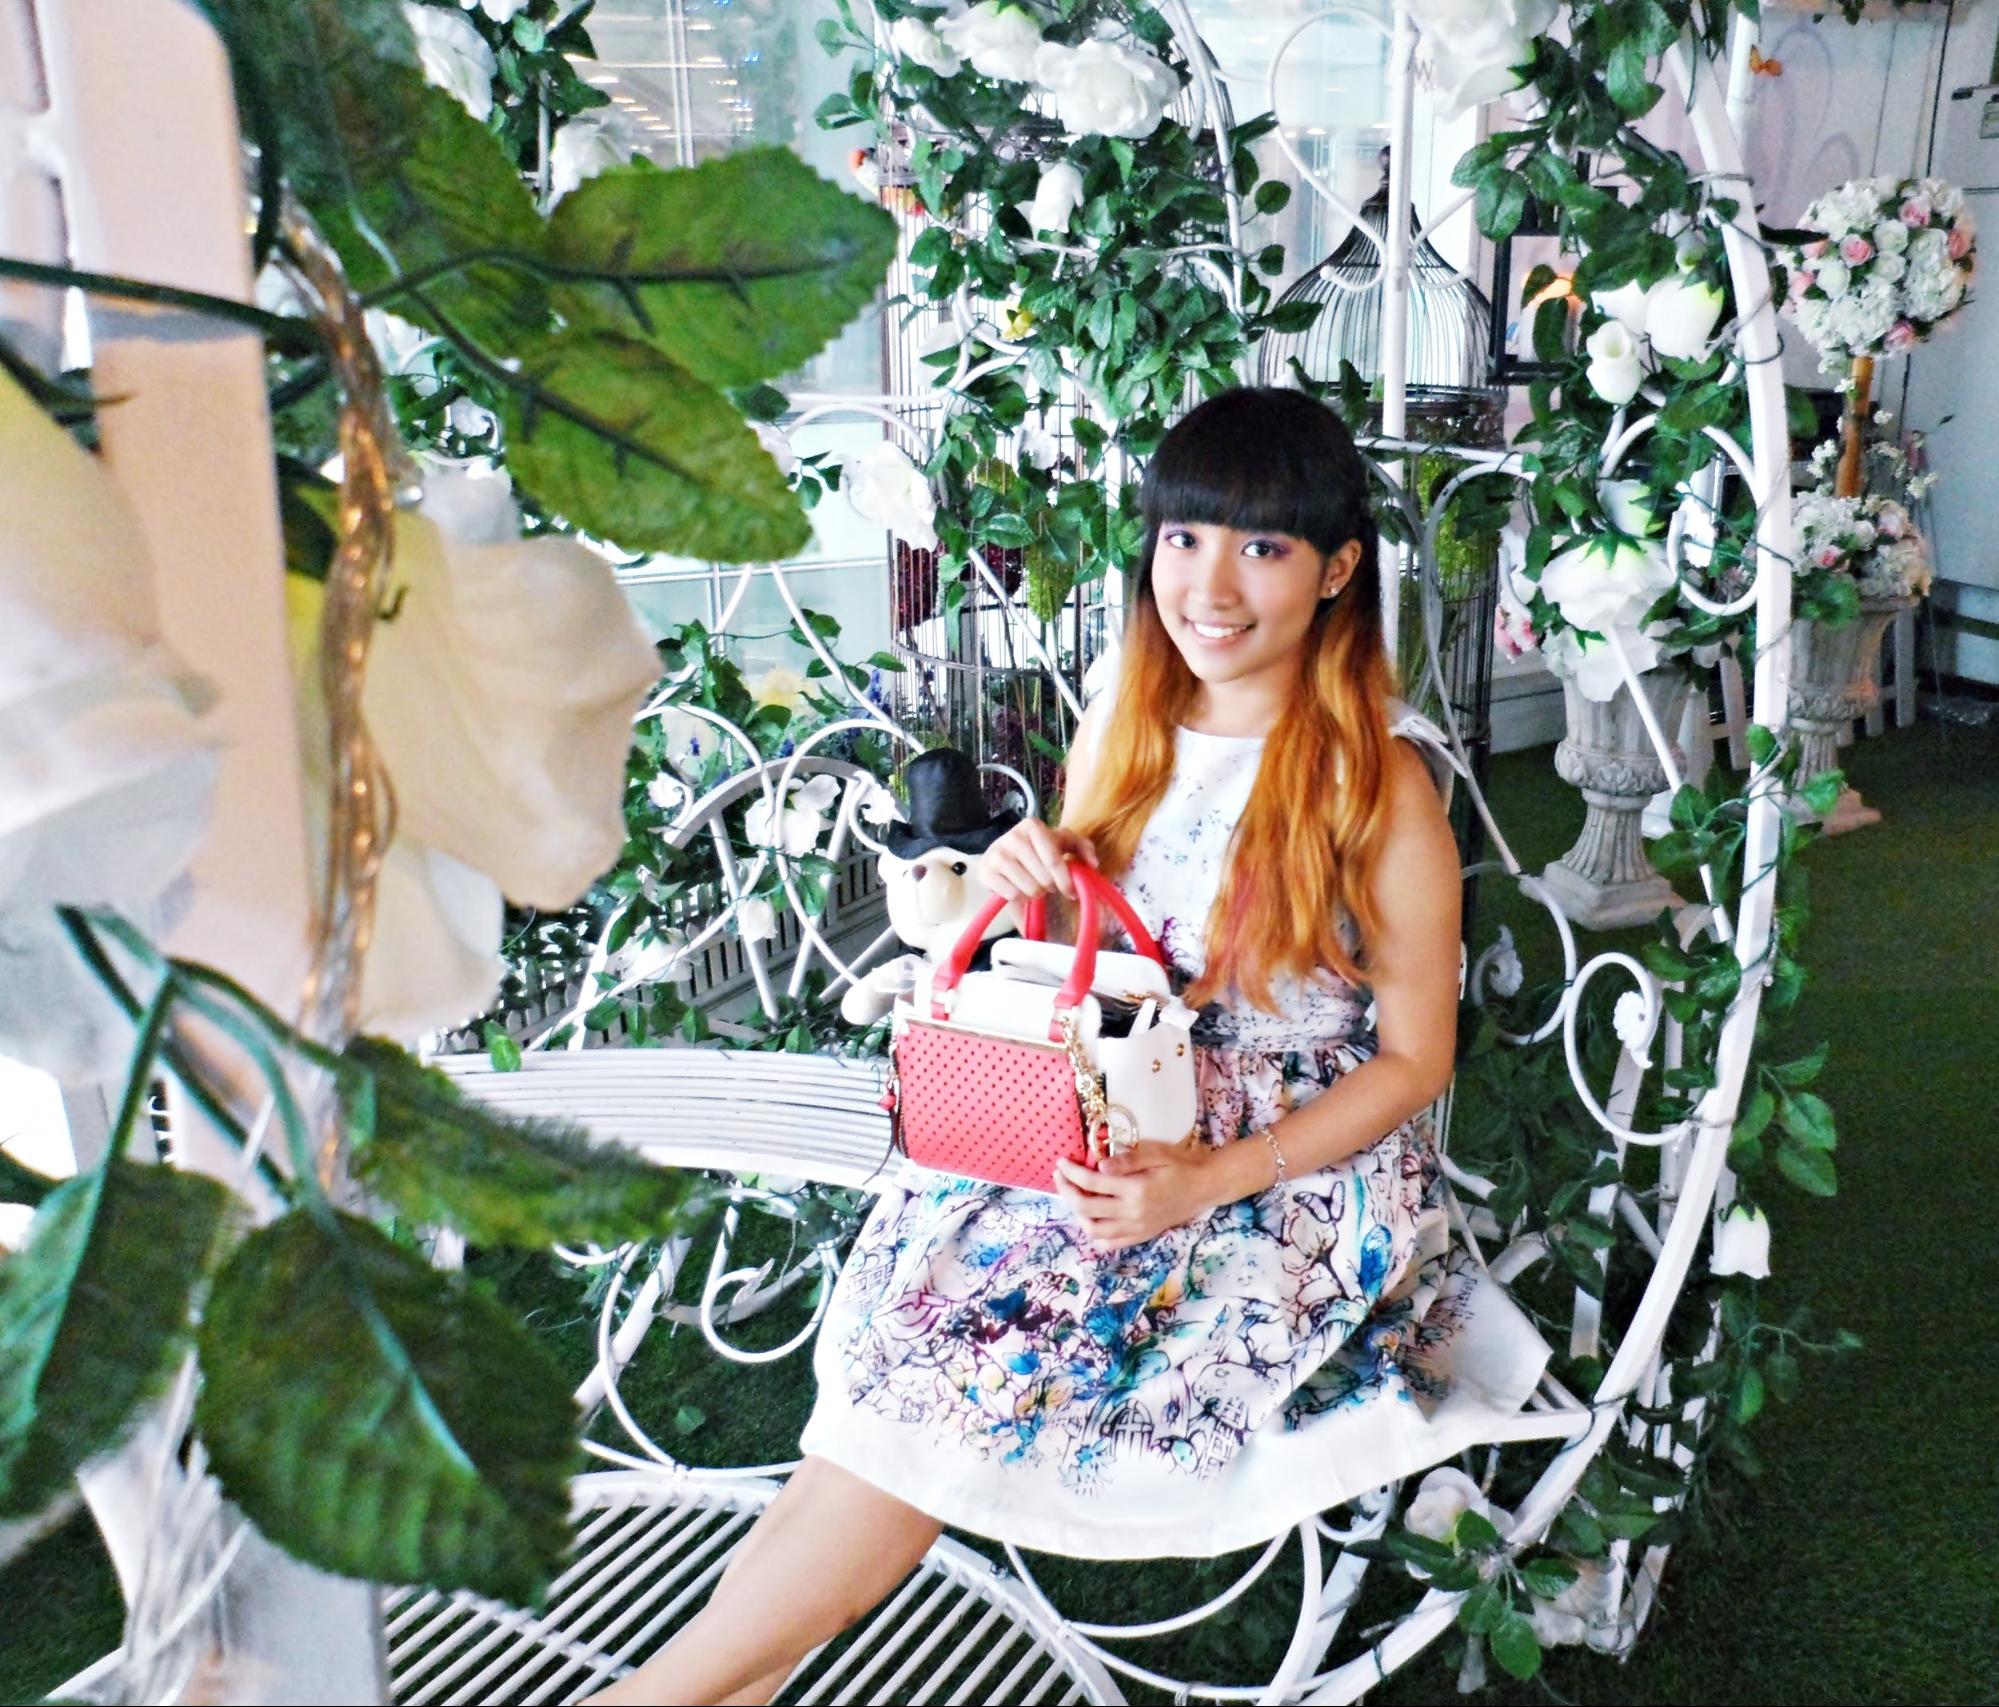
I’ve always fancied myself half-unicorn, so I spent years wishing for coloured streaks in my hair. I’m not talking about simple brown or blonde highlights – boring! I was after crazy locks in purple, pink, and bright red – those “anime character” shades that have zero way of being produced by an actual human’s hair follicles.
After ditching my school uniform for uni life – where rules about physical appearance were nada – I took the plunge to get my dream hair colour. But while my friends were spending over $200 even for simple dip-dyes, my broke self decided to take my tresses into my own hands and DIY it, even the bleaching.
It turned out pretty amazing and I didn’t end up botak, so here’s a guide on how you can bleach and dye your own hair from just $30.
Check out our other hair-related articles:
How to bleach your own hair
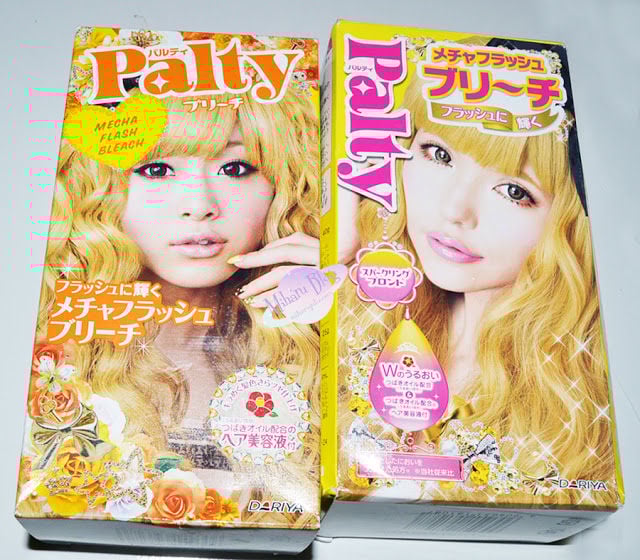
Image credit: Miharu Julie
While not usually required for darker shades of brown, there’s no escaping the bleach if you want wacky colours, especially if you’re going for pastel shades. I learnt this the hard way, first using blonde box dye in a sad attempt to bypass the dose of harsh chemicals. Needless to say it didn’t work, and my hair only turned 3 shades lighter to a muddy poop-like brown 💩.
I then invested in some bleach from Japanese brand Palty, which interestingly came in different tones. I first used an orangey shade, as the blonde one was out of stock and I was impatient. My hair turned coppery, and while this was a significant change, I didn’t think it was light enough for my desired hair colour. I later went over it with blonde bleach from the same brand once it was back in stock.
As I didn’t wish to damage my scalp or roots, I opted for a dip-dye. This was simply done by sectioning my hair into 2 low ponytails in front where I could easily see them, and working all the way till where the hair ties were (around ear-level).
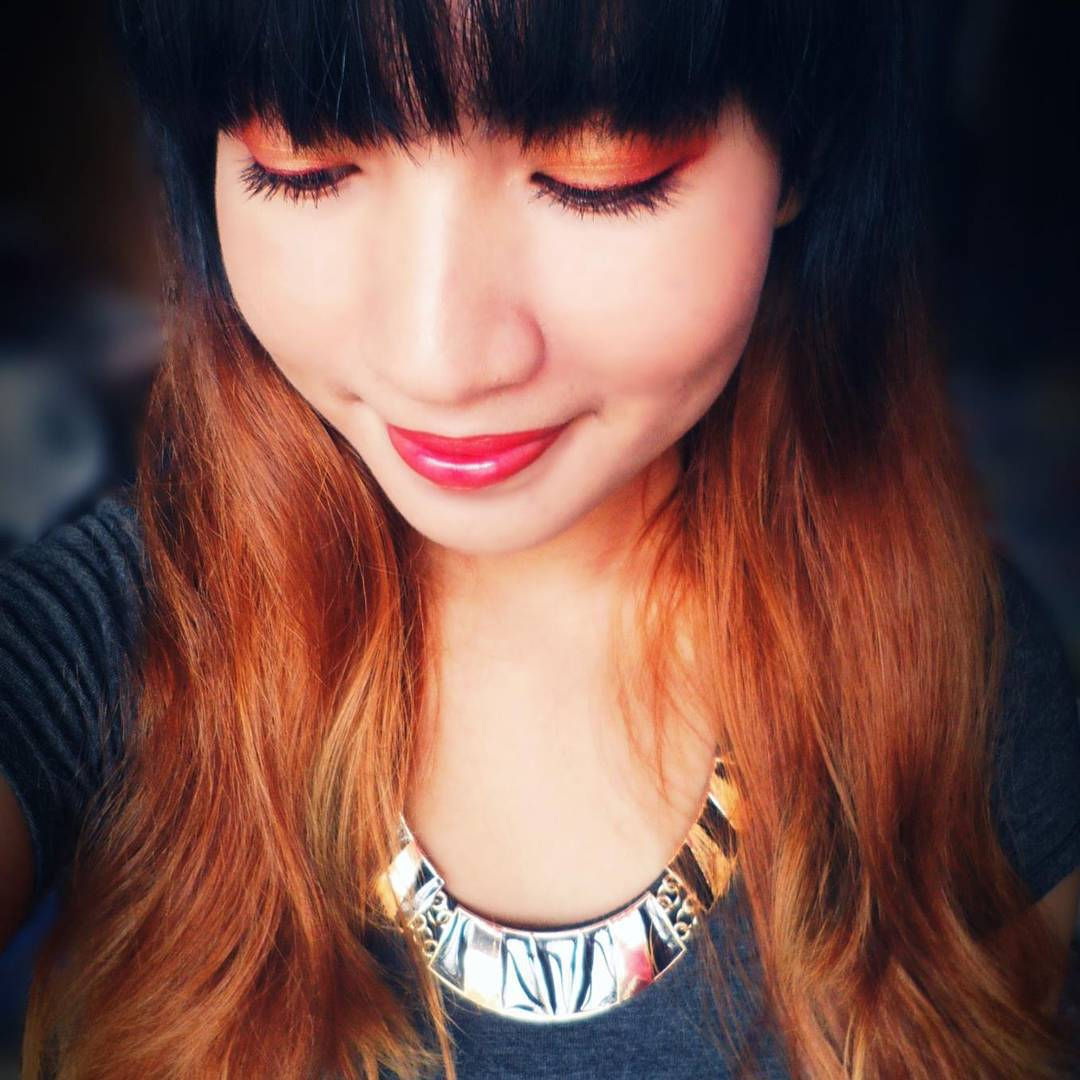
Image credit: @caramellechaos
Most hair bleach brands should come with a comprehensive set of instructions, so do follow that closely and don’t ever skip using the gloves and ear caps provided (get your own if not included). The kit should come with a comb-like applicator which allows for easy distribution of product. If your hair is thick, it’ll also be a good idea to go through it with your own larger comb at intervals just to ensure that everything is evenly applied.
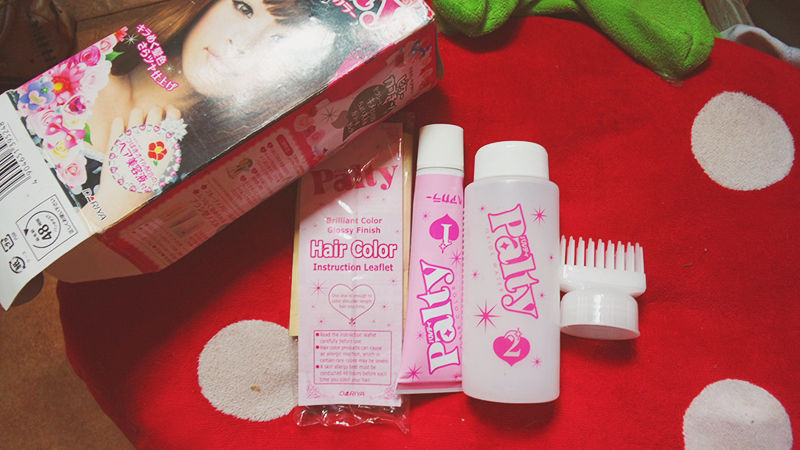
Image credit: Drip Drip
Here are some additional tips that the instruction manuals may not include:
- Always use a cape, as the bleach will stain your clothes. My black t-shirt now has permanent streaks of brown all over it.
- Use an old towel or cling wrap to protect your neck. I forgot, and ended up with mild bleach burns.
- Remove all jewellery as it will corrode
- Try to do everything during the day, as you’ll get to accurately see how your hair looks in the light.
- Start from the bottom and work your way up so the transition from root to tip looks more natural. The part you work on first will always have the strongest results.
- If you have thick or extremely long hair, make several partings and clip different sections up, and only release them when you’re going to start on them. This will make everything easier to manage.
Image credit: wikiHow
At most salons, bleaching is done all at one shot, which means you’ll be seated there for maybe 6 hours. I didn’t want to risk having my hair melt off – nor did I have the patience to do everything at one go – so I waited a week in between both bleach sessions. I believe this helped my hair “rest” a bit, but I also had to walk around looking fairly odd for that period of time.
Looking like a carrot after 2 rounds of bleach. Not one of my best looks, but it was worth it.
Image credit: @caramellechaos
Bleaching twice left me with a golden-blonde shade. As I was going for bolder colours in my end product rather than light pastels, I decided to stop right there. It’ll be a good idea to do a strand test using your desired hair colour just to be sure that it’ll show up properly. You don’t want all that effort to go to waste.
Palty was discontinued a couple of years ago, but Gatsby also has DIY bleach with different colour tones. EX Hi-Bleach is their strongest, which should take virgin hair to a light blonde after 2-3 rounds. Opt for the silver version if you’re going for paler or more muted shades. You can easily get these from drugstores like Watsons for around $10 per box.
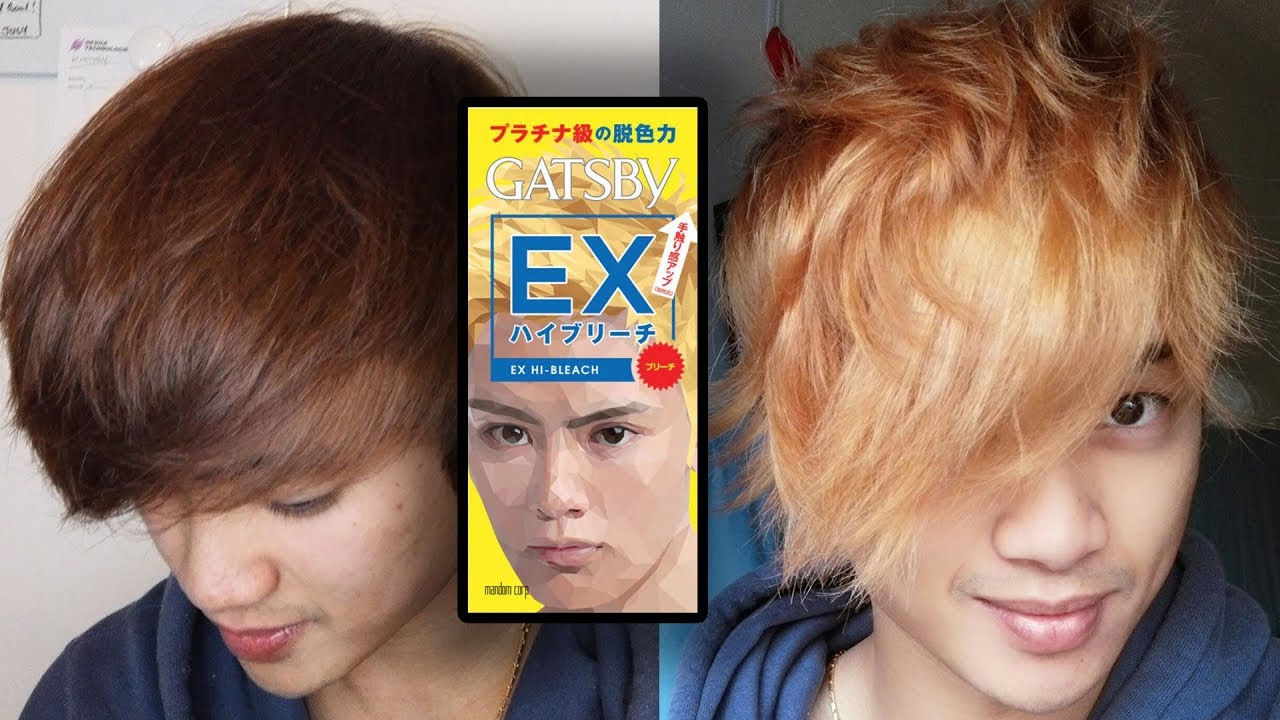
Gatsby EX Hi-Bleach
Image credit: JMacro
Don’t be fooled by the male-geared branding, because there’s actually enough product for long hair. In fact, if you were to compare the product amount to that of other dye brands featuring female models, you’ll find that it’s around the same.
Brands of colourful hair dye in Singapore
The bottle may not be too pretty, but this brand is legit.
Image credit: Maine Lyn
Now that the difficult part is over, here comes the fun – colouring!
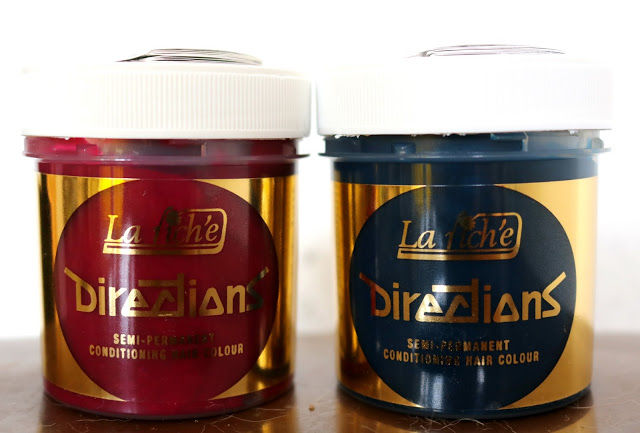
One brand of hair dye rainbowheads around the world swear by is Directions, also known as La Riche. That was what I used. You’ll be glad to know that the brand is vegan and cruelty-free, with no ammonia, peroxide or PPD. No mixing required; You simply slather the product straight onto your hair. Easy peasy!
You can use a brush to apply the dye, but I prefer using my hands as I find it faster and more thorough. Because it’s so safe, you can actually work with Directions using your bare hands, but be prepared for some dry skin afterwards. It’s always good to use gloves.
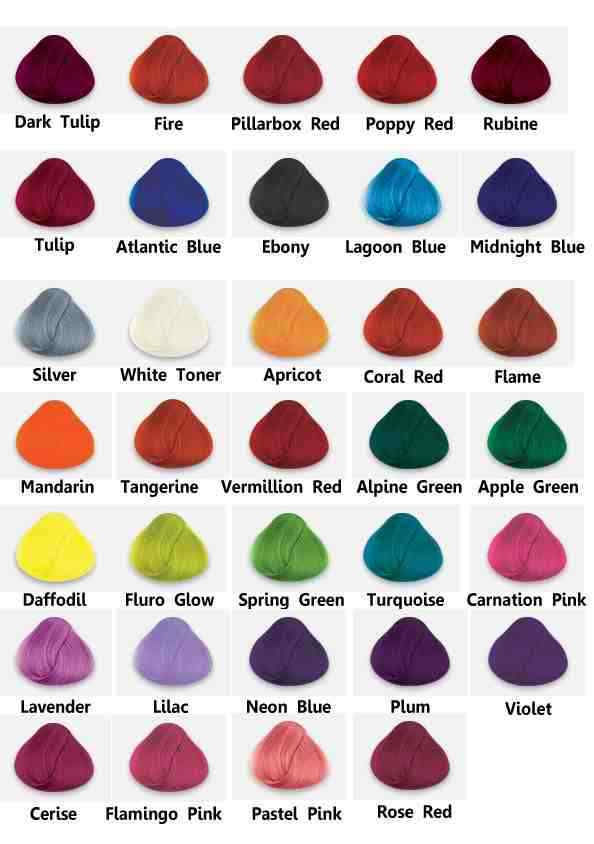
Range of colours from Directions
Image credit: Directions
A couple of years ago, Directions was being sold for over $23 per bottle at *SCAPE, as the brand had just entered Singapore with few alternatives in the market. But lucky you, because it’s now going for a mere $9 at stores like Venus Beauty.
Another option is Manic Panic, which comes with just as extensive a range but costs twice the amount.
There are no rules when it comes to picking a colour. However, you might want to consider other factors like your wardrobe and skin tone. For example, if your clothes are predominantly pink, then having contrasting green hair might cramp your style a little. But if you think you can pull it off regardless, go for it!

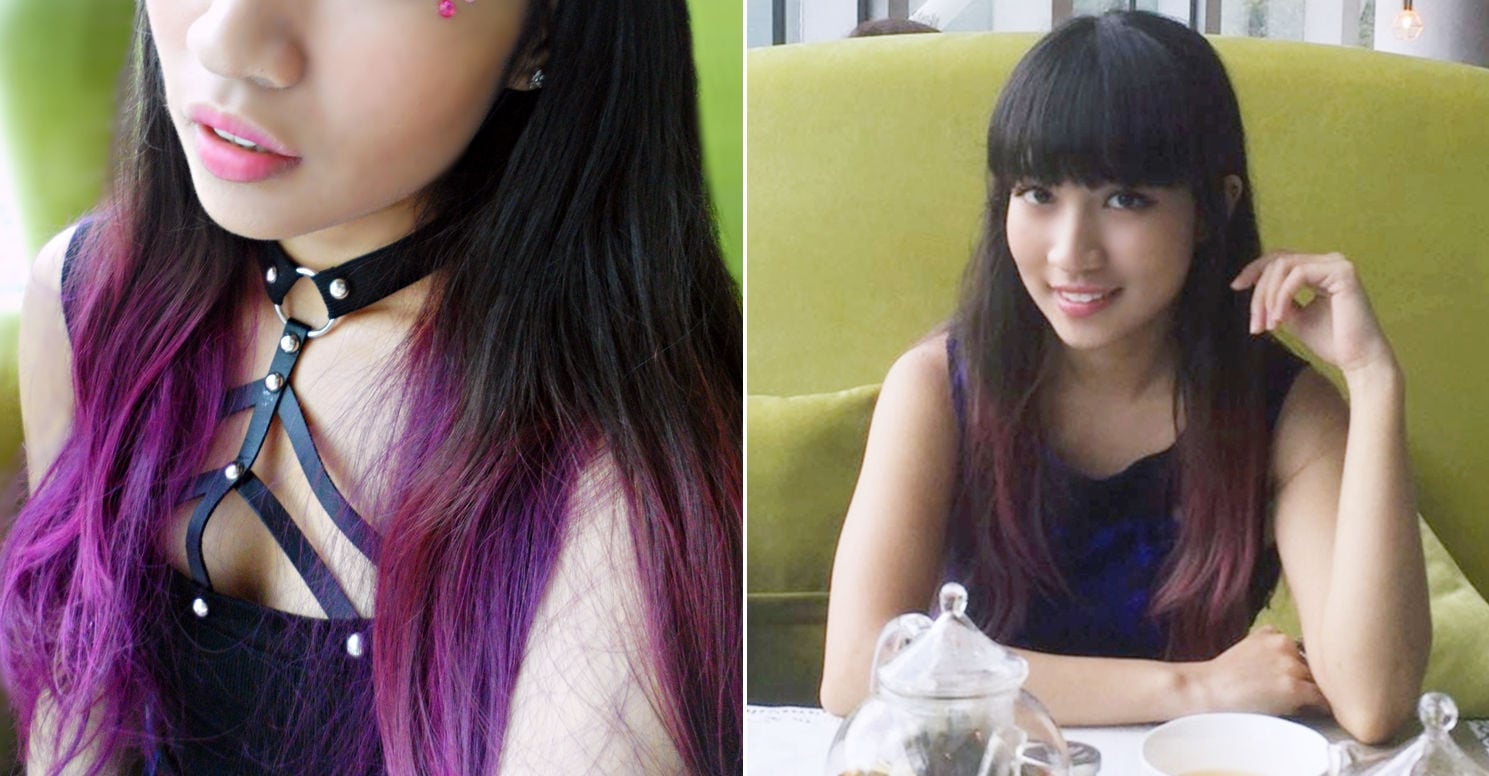
I used the shades Plum, Cerise, and Poppy Red
Image credit: @caramellechaos, @caramellechaos
It’s easy if you’ve selected a single colour. For different coloured streaks, you can separate the strands into sections using tin foil so that the shades don’t bleed into each other.
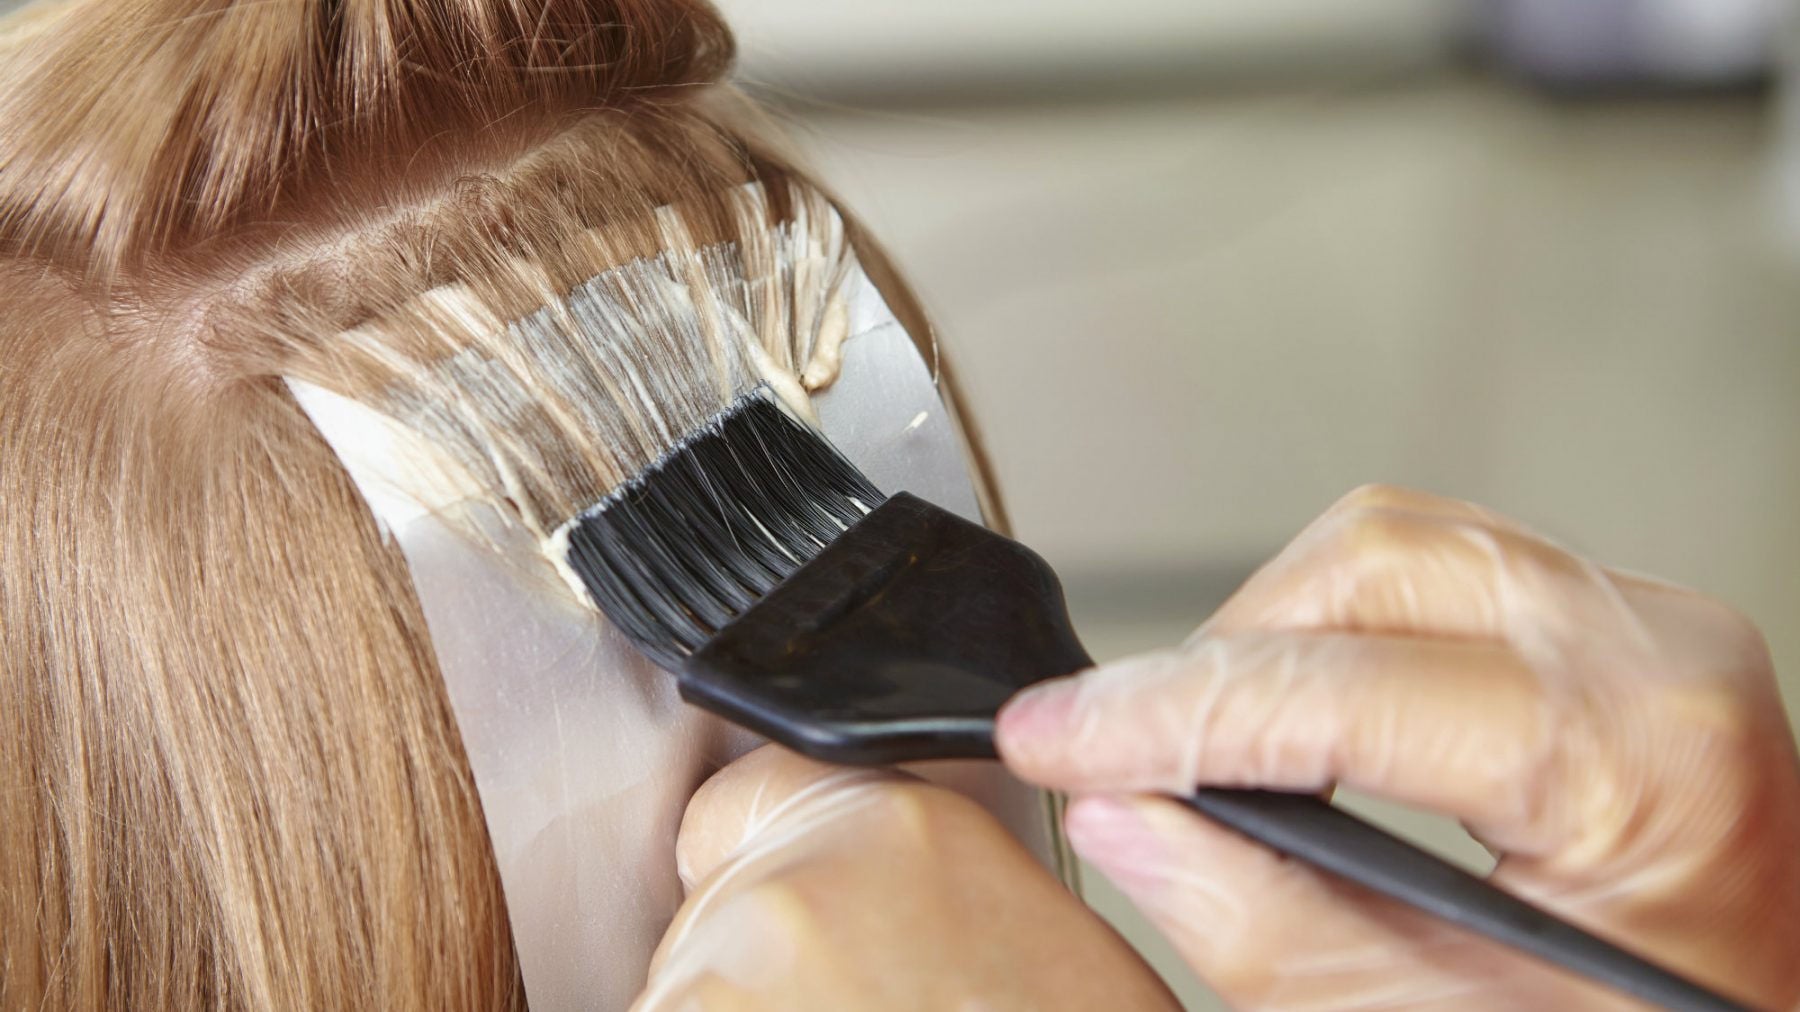
Image credit: Alexandria Tea Party
I went for an ombre effect, which started with a darker plum tone at the top and blended into a hot pink shade with slightly red tips. In such cases, some colour bleeding would help to create a more well-blended gradient, so don’t worry too much if things do get a bit messy.
Aftercare for bleached and dyed hair
Washing, conditioning, and hydrating

The Orchid Oil range from OGX is made specially for coloured hair, and contains UVA and UVB sun filters which will prevent your hair from fading or getting frizzy under the sun.
Image credit: @ogxbeautyuk
First things first: Get shampoo and conditioner specifically for coloured hair. Do not scrimp on this! It really helps lock in the colour and prevent it from running too much – although some running with each wash is still inevitable. I used Alba Botanica from Watsons, which is 100% natural and has plenty of plant-based ingredients, but of course there are tons of other brands you can choose from.
It is usually advised to avoid washing your hair until a week after the dye job, and after that, you’re only supposed to shampoo 2-3 times a week. I lasted all of 3 days before I caved, as I have an oily scalp that isn’t made any better with our humidity. From there, I proceeded to wash my hair on a daily basis, but focused more on my scalp rather than the coloured ends.
Oh, just a heads up: Be prepared for your hair towel to slowly take on the shade of your hair dye.

Image credit: @ti5hani
Simply using conditioner won’t be enough to save your locks from taking on a grass-like texture. Using hair masks on a regular basis and leave-on hair serum is a must. When I had first bleached my hair, I pretty much used my hair mask daily as a conditioner of sorts.
I also brought my bottle of Grapeseed Glossing Serum ($22) from The Body Shop wherever I went, faithfully reapplying it 3-4 times throughout the day. Call it kiasu-ism, but my friends commented on how they were surprised my tresses were still relatively smooth despite all I had put it through *hair flick*.
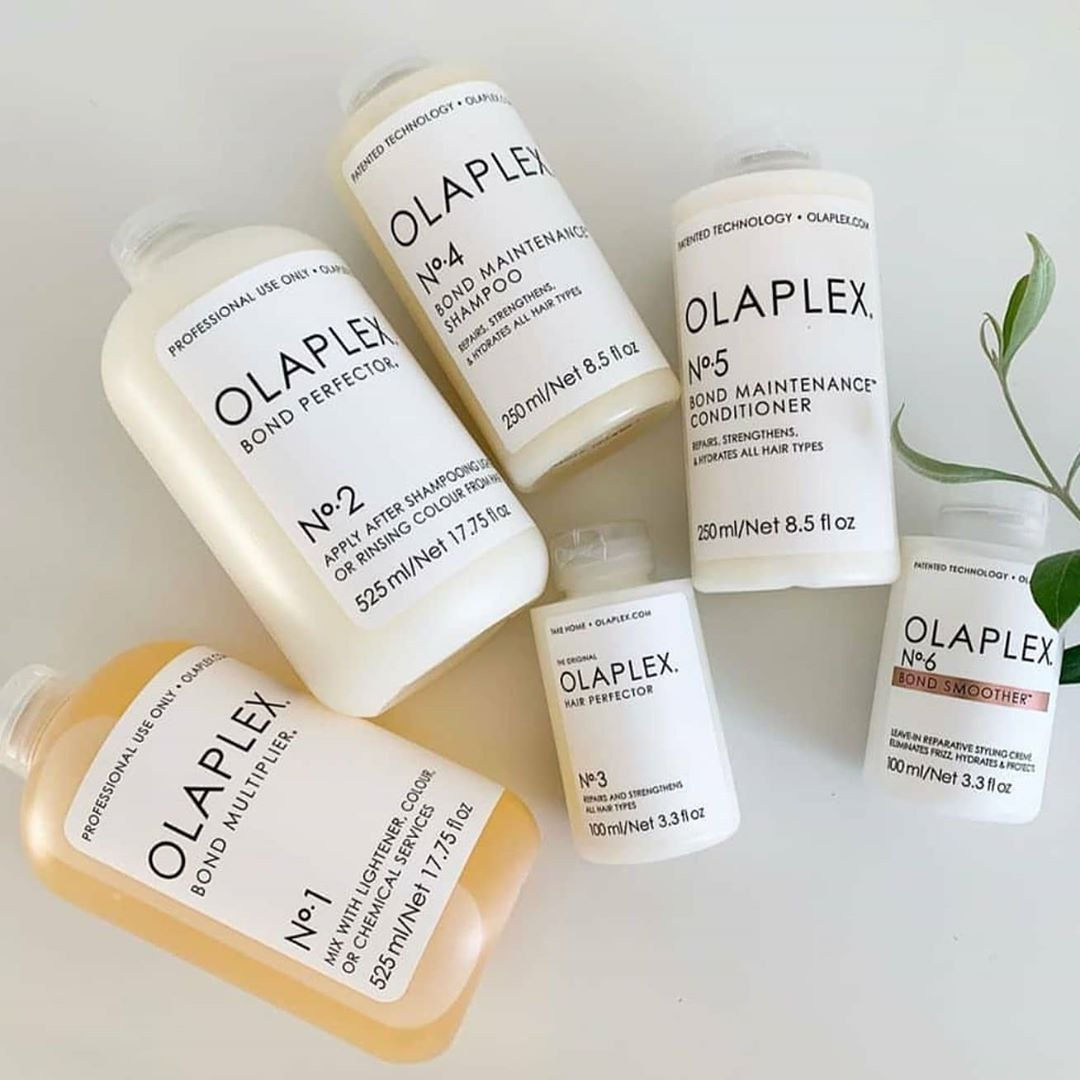
Image credit: @focushairstudio
Though I have never used it myself, the haircare brand Olaplex is one to consider as it has received rave reviews. Be it the shampoo, hair treatment, or special Bonding Oil, their products are reportedly able to repair the broken bonds in hair that has been heavily abused. You can get them at Sephora.
The fading process
Not me, but that’s basically what happened.
Image credit: Evelyn Lopez
So, here’s the thing about hair in funky colours – it fades super quickly, whether you’ve had yours done at a salon or otherwise. You have 2 options: Maintain it rigorously, or embrace the fading process and watch your hair transform over time.
I inevitably picked the latter, because I had reacted too slowly to fight the fade. That’s right – if you wait too long before starting maintenance, you might not be able to stay close to your initial shade.
What colour your hair fades to heavily depends on the colour you’ve chosen, as well as the base colour. It is worth noting that purple hair almost always turns green, as the blue pigments in the purple dye tend to react with the yellowish tinge of the bleach (blue + yellow = green). Unless, of course, you’ve bleached your hair to grey or almost white, in which case it’ll fade to a pale or dull purple. Red hair usually becomes orangey or auburn.
Let’s put it this way: With all the colour transformation going on, it’s almost like you’re getting numerous “free” shades with just one bottle of dye.
*
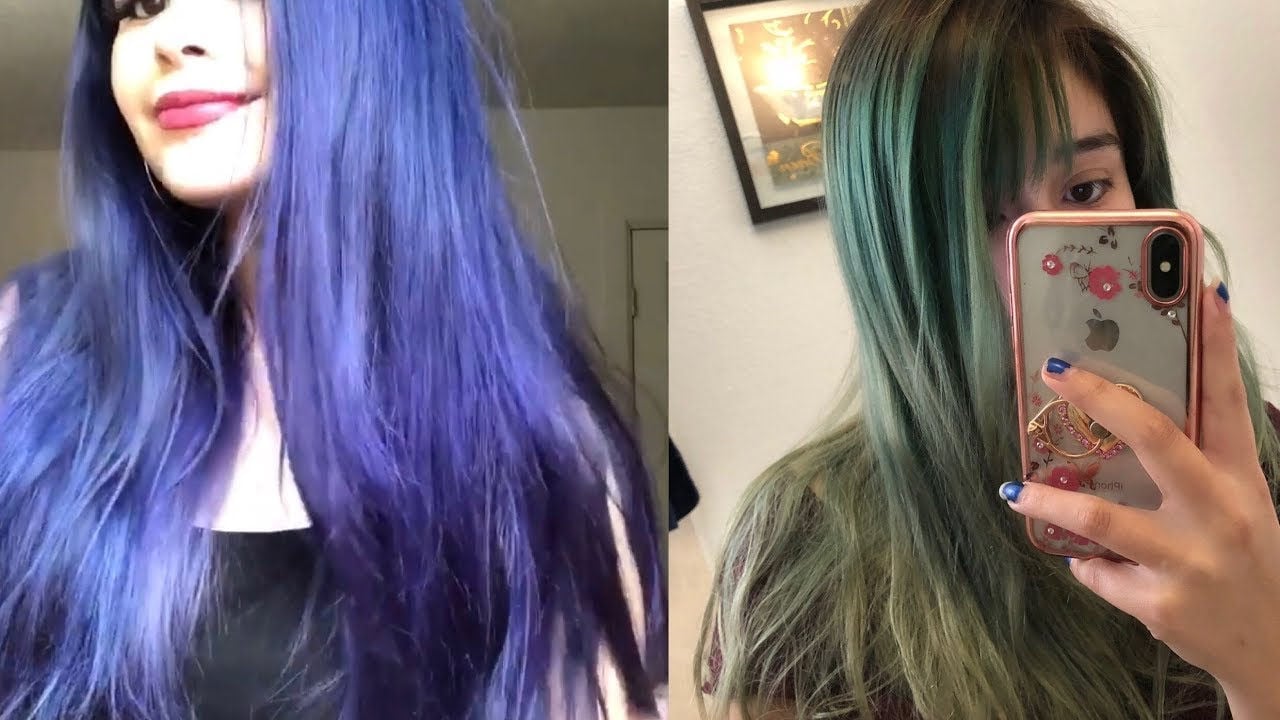
After the first few washes, the plum portion of my hair stained the pink and red parts into purple. Everything then turned blue-ish, which eventually made way for green. This took all of 1 month to happen. At one point, I had multiple shades of these colours in my hair as not everything fades at the same pace.
The faded, multi-toned mess and the blue cover-up, which was a mix of Atlantic Blue and Neon Blue from Directions.
Image credit: @caramellechaos, @caramellechaos
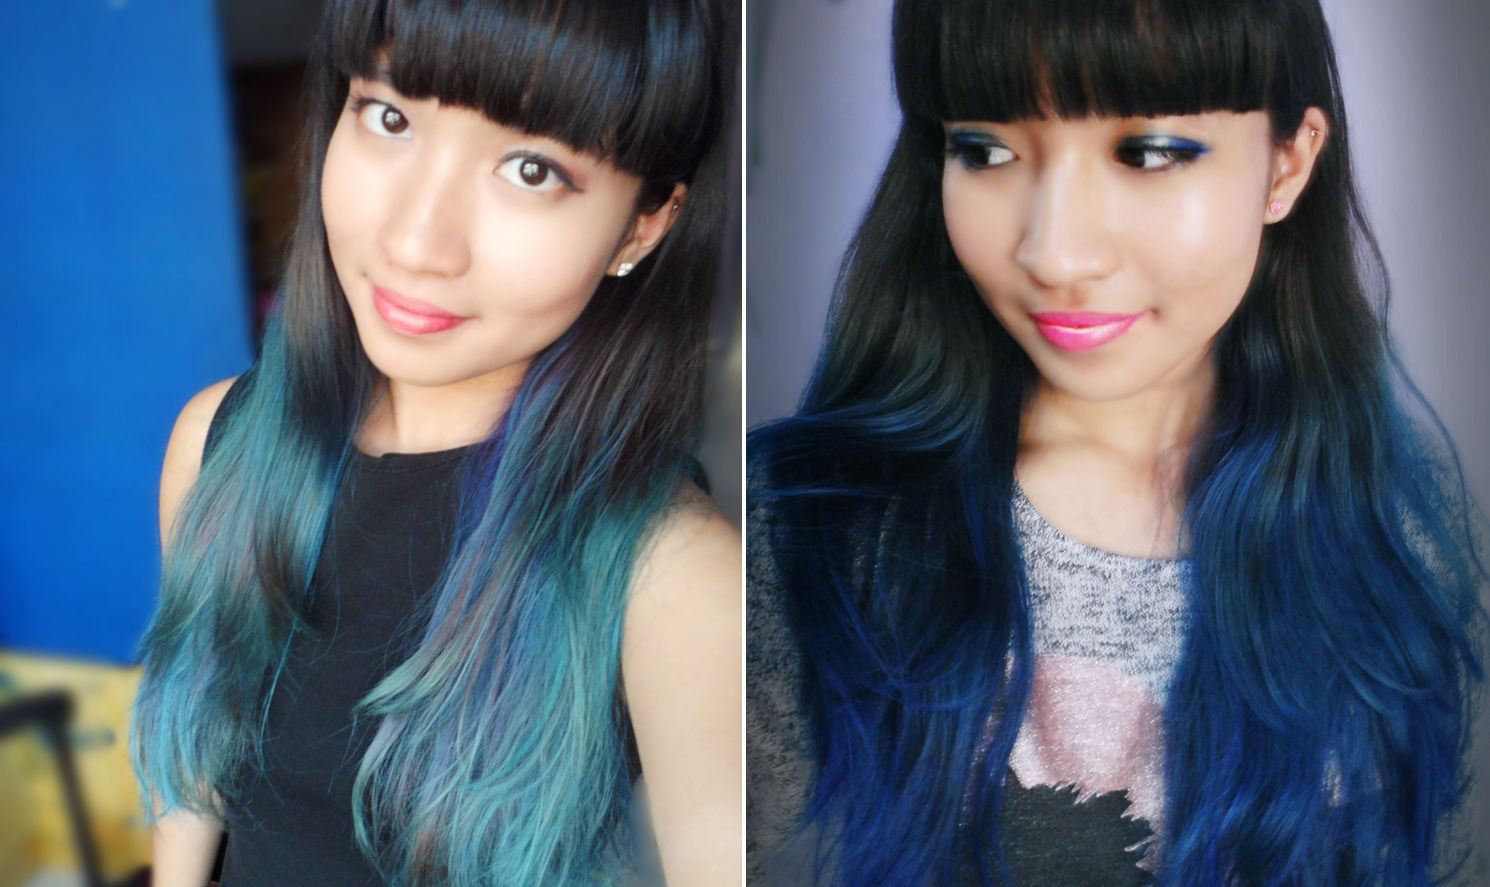
Sounds like a nice mix, but I wasn’t fond of how everything was dull and uneven. To combat that, I covered everything in a cobalt blue. That, too, faded to green, but this time, it was a vibrant shade of turquoise.
Left: Channelling Wednesday Addams. Right: How the turquoise shade looked like under bright sunlight.
Image credit: @caramellechaos, @caramellechaos
Green pigments are extremely strong, so the stubborn turquoise shade didn’t budge despite repeated washes. After I got sick of it and realised it wasn’t going anywhere, I tried covering it up with pink, which resulted in a bright purple. That eventually became a muted purple, which I felt was dragging down my look as it was “neither here nor there”.
The bright purple after putting pink dye over turquoise hair, versus the faded version 1.5 weeks later.
Image credit: @caramellechaos
Finally, I used a striking red Revlon box dye with peroxide in an attempt to brighten things up a little. After the initial colour wore off, I was left with a reddish brown, which morphed into a pleasant blonde-brown over the next couple of months.
Red box dye -> The final colour
Image credit: @caramellechaos, @caramellechaos
Some people opt to use purple shampoo as it helps maintain and enhance coloured hair by balancing out any yellow, brassy tones. You can use purple shampoo even if your hair isn’t purple as the concentration of pigment is very low – think of it as a “colour corrector”.
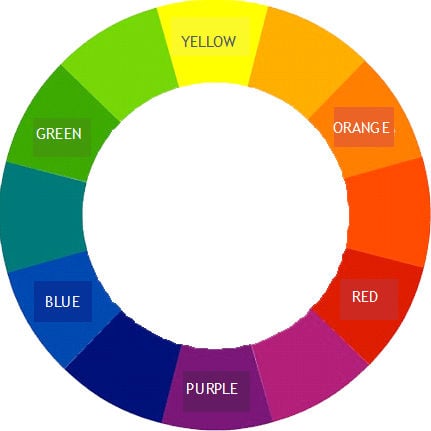
Image credit: Ugly Duckling Colour
Refer to a colour chart if you are unsure – colours on the opposite ends of the spectrum will help neutralise each other. As you can see, purple and yellow are directly contrasting. It is highly possible that my hair didn’t fade back to green once again, as the red box dye I used probably got rid of any remaining green pigments.
Hair dye and bleach options in Singapore
Try dyeing your own hair if you trust yourself and have extra time on your hands. It’ll save you a great deal of money and you’ll be able to spend on better aftercare, which is really important when your hair has been chemically treated.
Assuming you’re going for just 1 shade ($9) and only require 2 rounds of bleach ($10 x 2 = $20), you’ll be spending a minimum of $30 – that’s a far cry from the $200 or more you’d have to fork out at a salon! If you do it right, the results can be just as good as a job done by a pro – or perhaps even better. Even if you want more colours for that Rainbow Dash vibe, you probably won’t be parting with more than $100.
Admittedly, I haven’t dyed my hair since – due to various reasons like laziness and wanting to let my natural hair thrive for a bit. But if I were to get my tresses coloured once more, I’d definitely DIY it all over again!