DIY home garden
With everyone staying home during the Circuit Breaker, now’s the perfect time to work on some hobbies to pass the time. Not only does having greenery around the house beautify the space, growing plants also help to reduce stress and anxiety, especially if you’re feeling a tad cooped up indoors these days. It’s a therapeutic hobby worth picking up to feel a sense of accomplishment once the little baby plants grow.
Starting your own home garden can seem a little daunting for those with a budding green thumb. But you don’t actually need much to get started and we’ll show you how, by using everyday items that you probably already have at home. For stuff like soil and fertiliser, you can easily order them from online nurseries and have them delivered to your doorstep.
Table of Contents
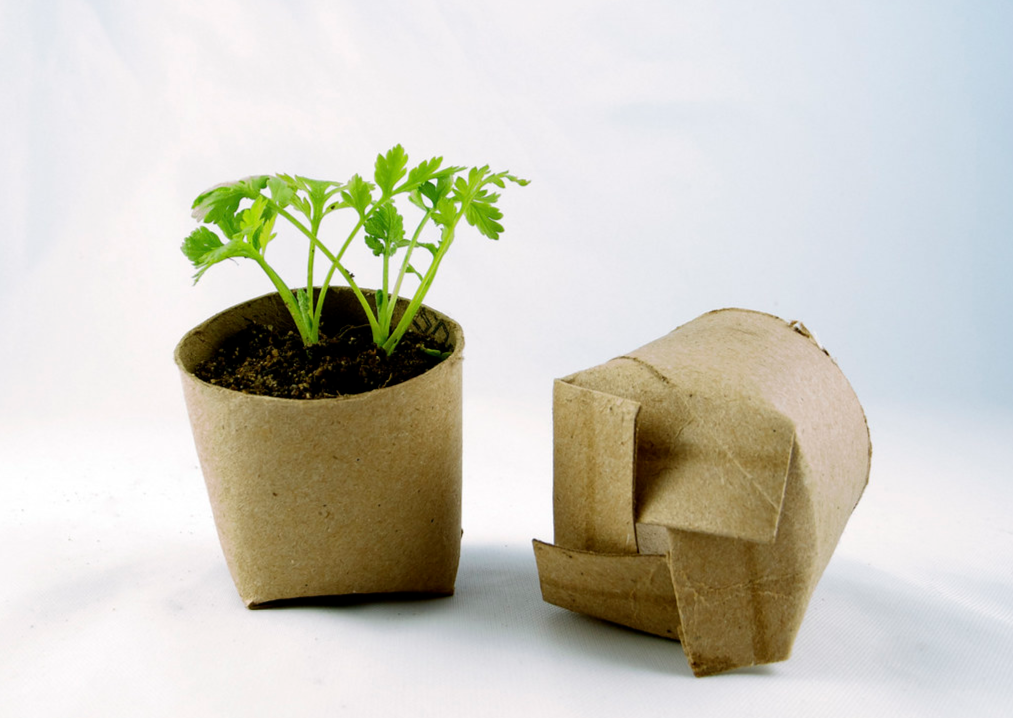
1. Start seedlings in toilet paper rolls
 Fold in the flaps you’ve made on one end to create a flat bottom
Image credit: Stacie
Seedlings are finicky little things. To ensure that their roots don’t get disturbed when you’re transplanting them into soil, start them off in paper roll cups. Get them from your used-up kitchen or toilet paper rolls.
Items needed: Paper tubes from used-up toilet or kitchen paper rolls, seeds of your choice, soil, a pot, and any available windowsill.
Time taken to grow: 4-7 days
How to grow:
- To make a lil’ pot, cut each roll in half to make them shorter and then make 4 cuts on one end to create 4 flaps.
- Fold the flaps inwards to make a sturdy bottom, then fill it with soil and seeds of your choice.
- Lightly spritz it with water each day.
- Once your seeds have sprouted their first two tiny leaves, you can transplant the whole paper roll into a pot with soil.
Pro-tip: Make sure none of the paper roll is above the soil as it’ll wick water away from the roots. The paper rolls will eventually degrade into the soil, turning into compost.
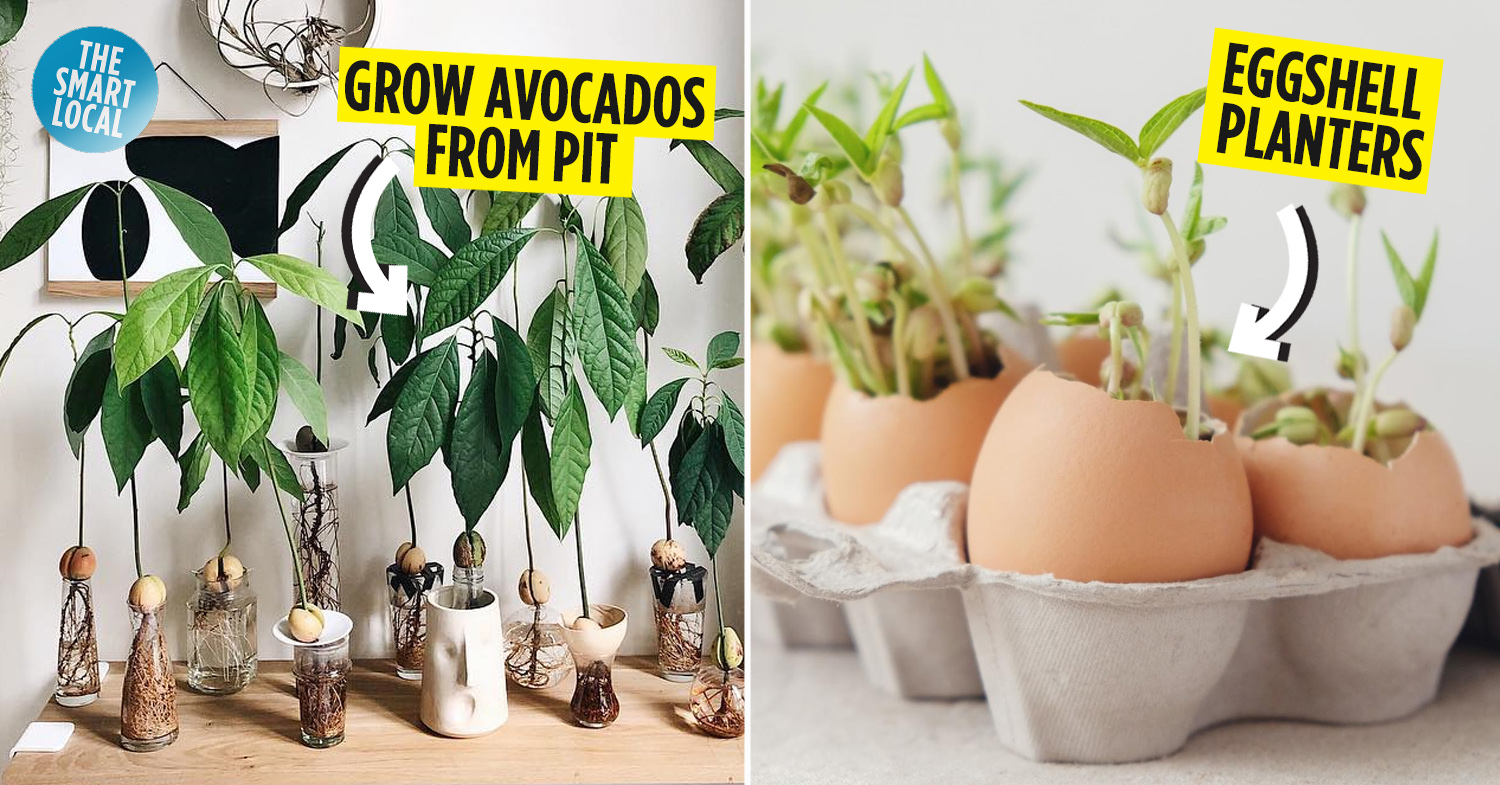
2. Plant seeds in eggshells
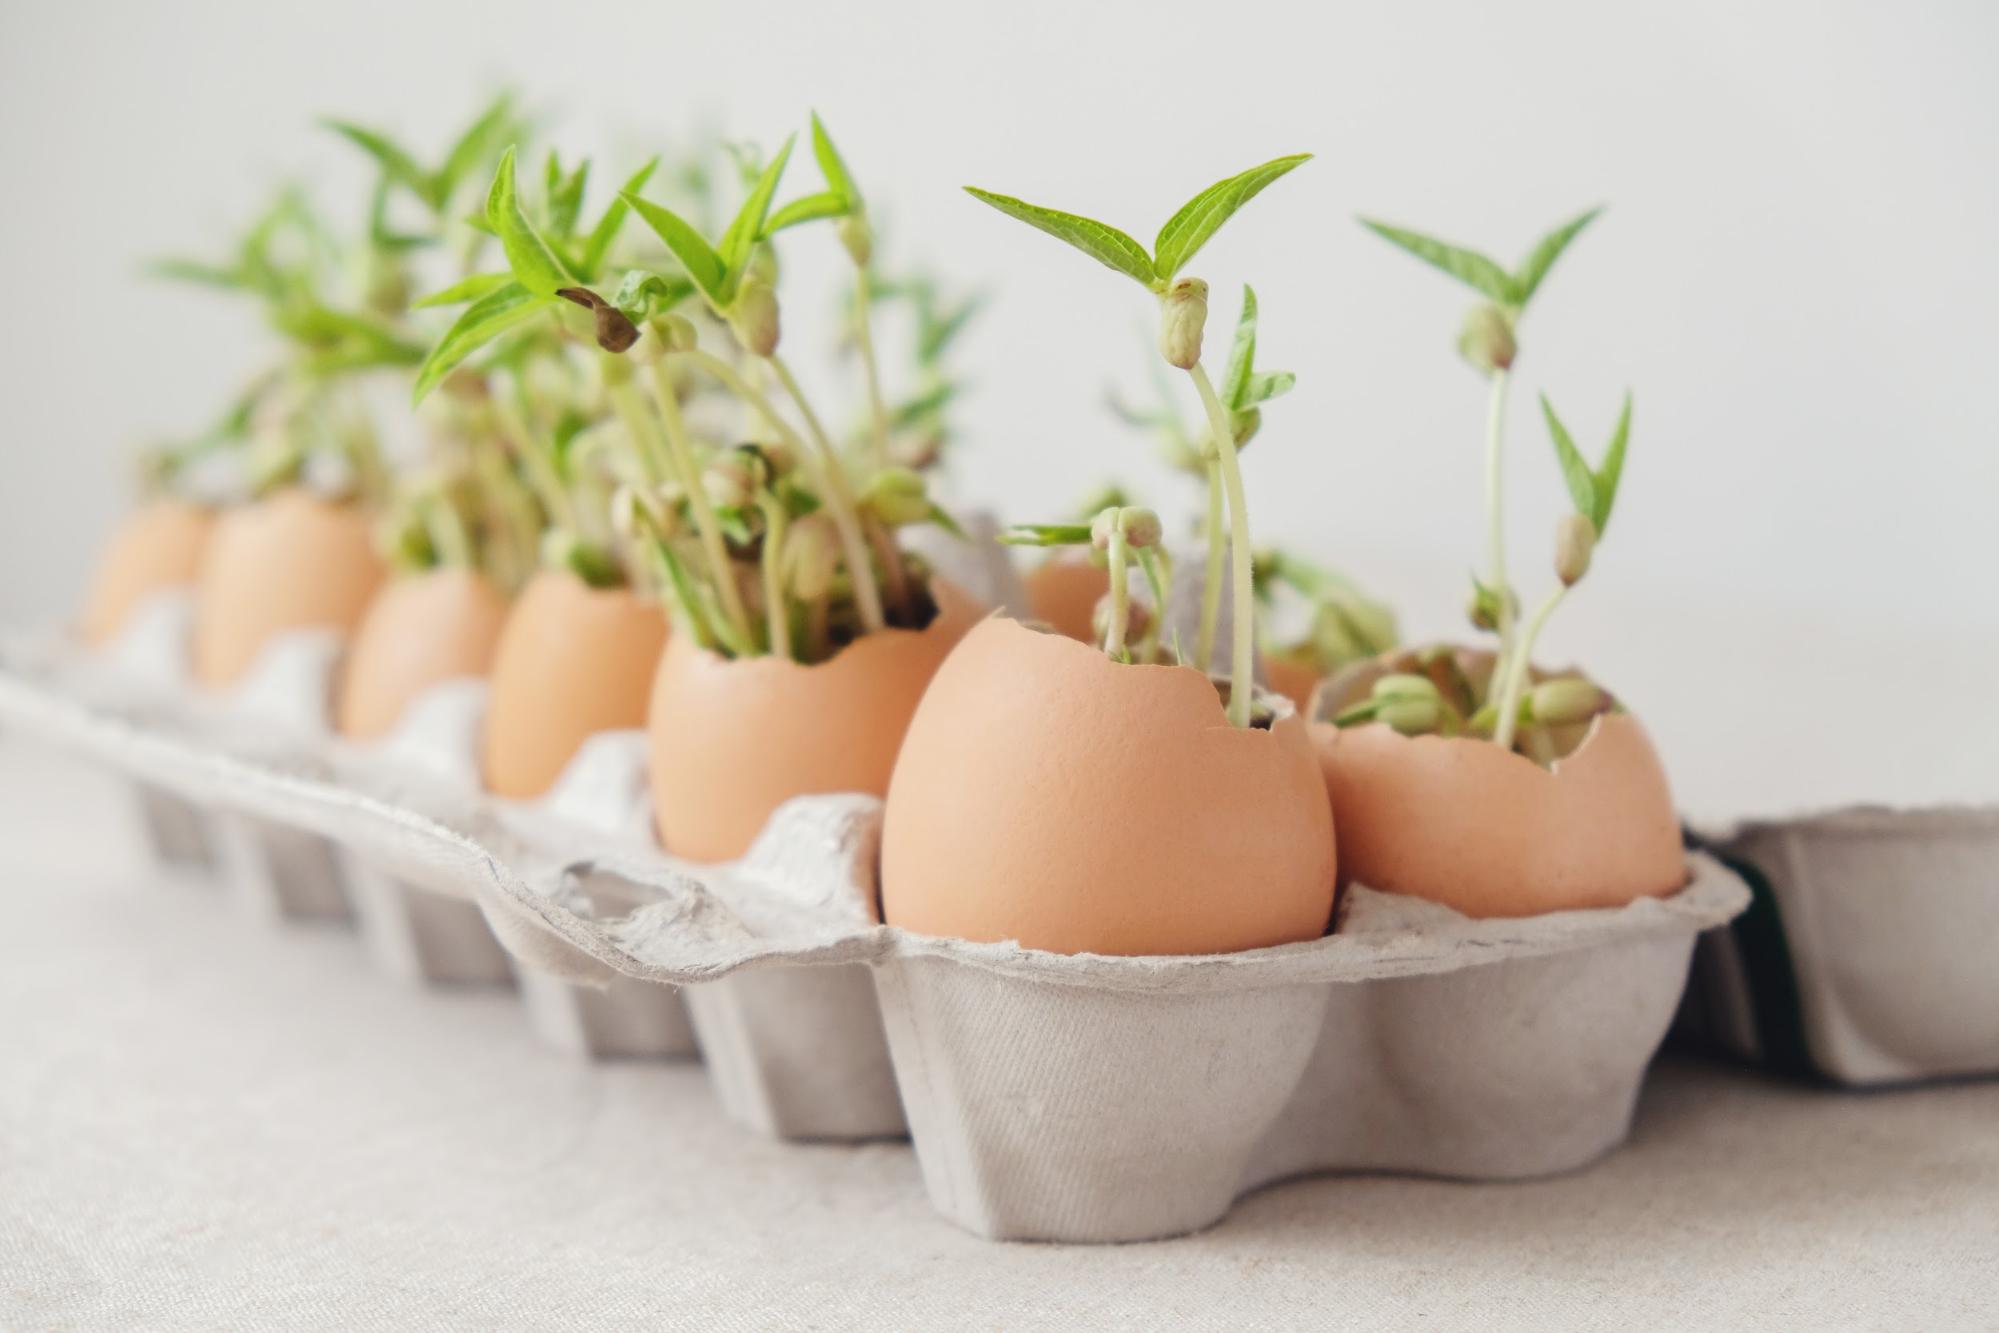
Image credit: SewCream
After using up about a dozen eggs for egg recipes at home, reuse your discarded eggshells as mini seed starters. They’re filled with nutrients and will be a quirky addition to your home garden.
Items needed: Eggshells and its used-up egg carton, seeds of your choice, soil, a pot, and any available windowsill.
Time taken to grow: 4-7 days
How to grow:
- Simply rinse the shells and allow them to dry out before filling it up with soil and seeds of your choice.
- Lightly spritz it with water each day.
- Once your seedling is stronger, transplant the whole thing – eggshell included- into a pot with soil. Crush the shell gently so that the roots are able to grow out.
The eggshells will be a good source of calcium for your plants as it degrades into the soil.
3. Grow potatoes from buds
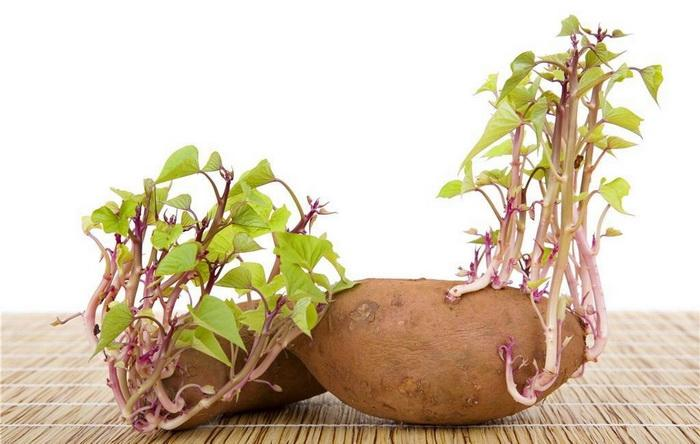 Sprouted potatoes are kinda gnarly but they’ll be hidden in the soil anyway
Image credit: GFinger
If you’ve ever forgotten about a bunch of potatoes in a dark corner of your kitchen, you’ll probably see small buds starting to pop up on the surface. Instead of throwing them away, plant these potatoes for an endless supply of fries in the future.
Items needed: Potatoes with emerging buds, soil, a pot, and a spot that gets at least 6 hours of strong sunlight each day.
Time taken to grow: 18-20 weeks
How to grow:
- Cut potatoes with buds into 4CM-5CM pieces with 2-3 buds on each piece. Dry out the pieces overnight to prevent rot.
- Plant them in soil with most of the buds facing up.
- Ensure that you water them daily.
- When the leaves start to turn yellow and die down around 18-20 weeks after planting, stop watering to let the fresh potatoes dry for 2 weeks.
- Harvest and cure the potatoes by leaving them out overnight before storing.
4. Regrow lettuce from its base
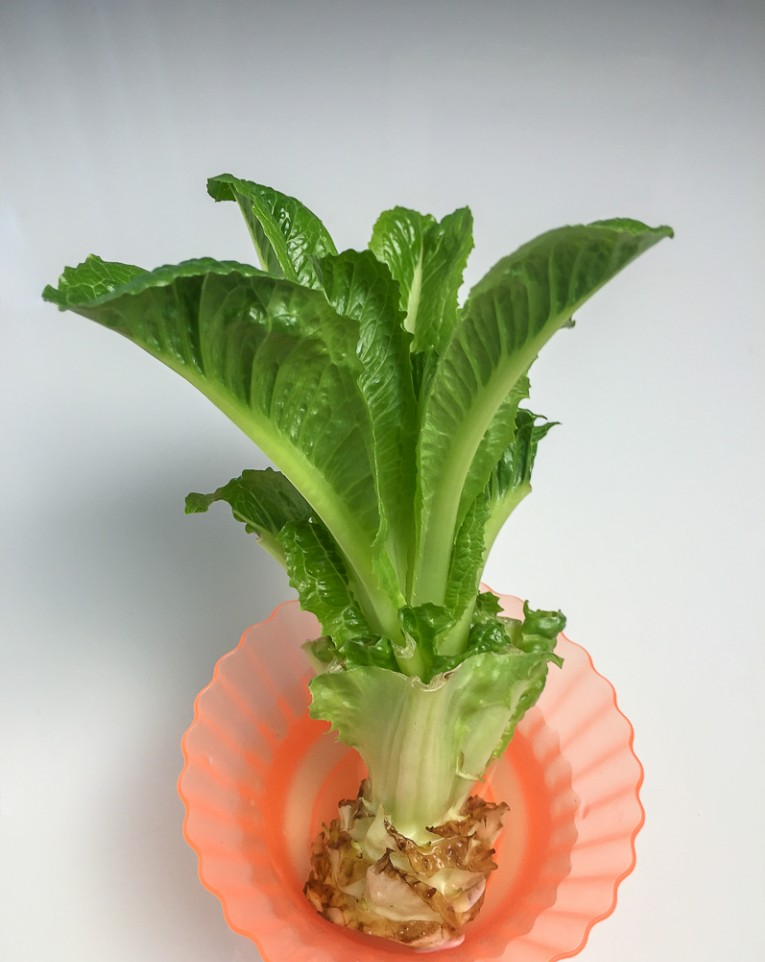
Image credit: Getty Stewert
The next time you’re making a salad at home, don’t throw away the base of the lettuce you’re using. This part of the lettuce which is usually headed for the trash can be repurposed into a brand-new lettuce head.
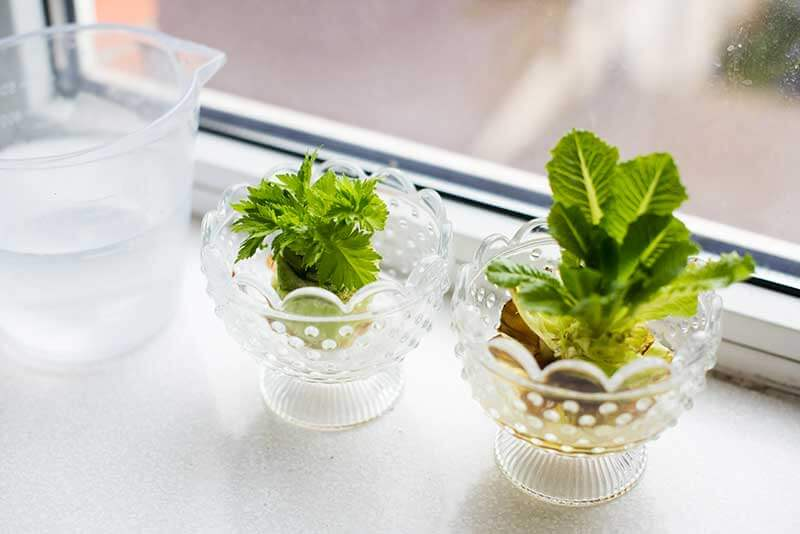 The growing lettuce heads can brighten up your kitchen
Image credit: GardenTech
Items needed: Lettuce base, a shallow dish, soil, a pot, and a spot with at least 6 hours of strong sunlight each day.
Time taken to grow: 45-55 days
How to grow:
- Cut 2CM from the base of the lettuce and place the cut-side up on a shallow dish.
- Fill the dish up with water, ensuring it reaches up to half of the base.
- Change the water daily and in about a week, you should see roots forming.
- Transfer the lettuce into a pot with soil, making sure the base is covered with moist soil.
- Harvest your lettuce when it grows large enough to uproot the whole thing.
5. Repurpose seeds from cucumbers
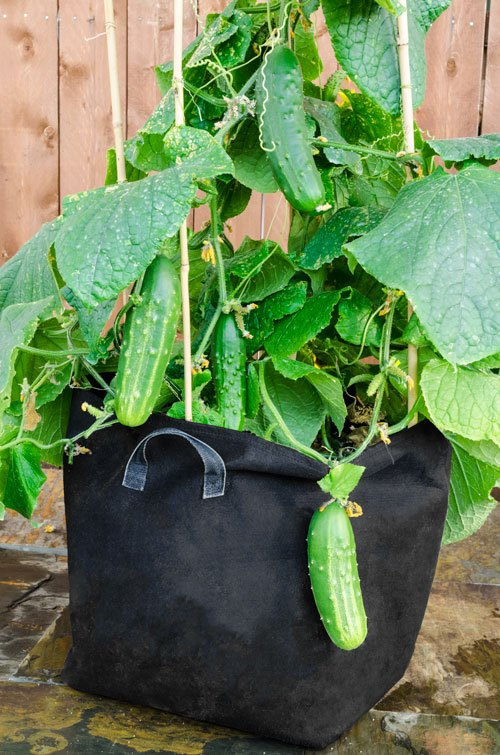
You can use grow bags instead of pots and ensure that you have a trellis for your cucumber plant to coil around
Image credit: Ace Gardener
Technically a fruit, the versatile cucumber can be eaten or used as a cooling mask to soothe puffy eyes. Grow them at home and you get the added aesthetic benefit of a leafy twiner plant that’ll give you fresh returns for your daily salad bowls.
Items needed: Cucumbers, a sieve, paper towels, a trellis, slow-release fertiliser, soil, a pot, and a spot with at least 6 hours of sunlight each day.
Time taken to grow: 50-70 days
How to grow:
- To grow your own cucumbers, simply scoop out the seeds from a cucumber into a sieve and rinse well.
- There might be remaining pulp surrounding the seeds so let them dry out on a paper towel for a day.
- Plant the seeds directly into soil mixed with a slow-release fertilizer and water it daily to keep the soil moist.
- The seeds should germinate within 4-10 days, so ensure that you have a trellis ready for your growing cucumber plant to cling to.
- Your cucumbers should be ready for harvest when they reach a length of about 17-22CM.
6. Grow avocados from their pits
Avocado plants are actually pretty sturdy greens to grow at home. The next time you’re done making avo toast or guac for your chips, save the whole pit to start your mini avocado plantation in yor home.
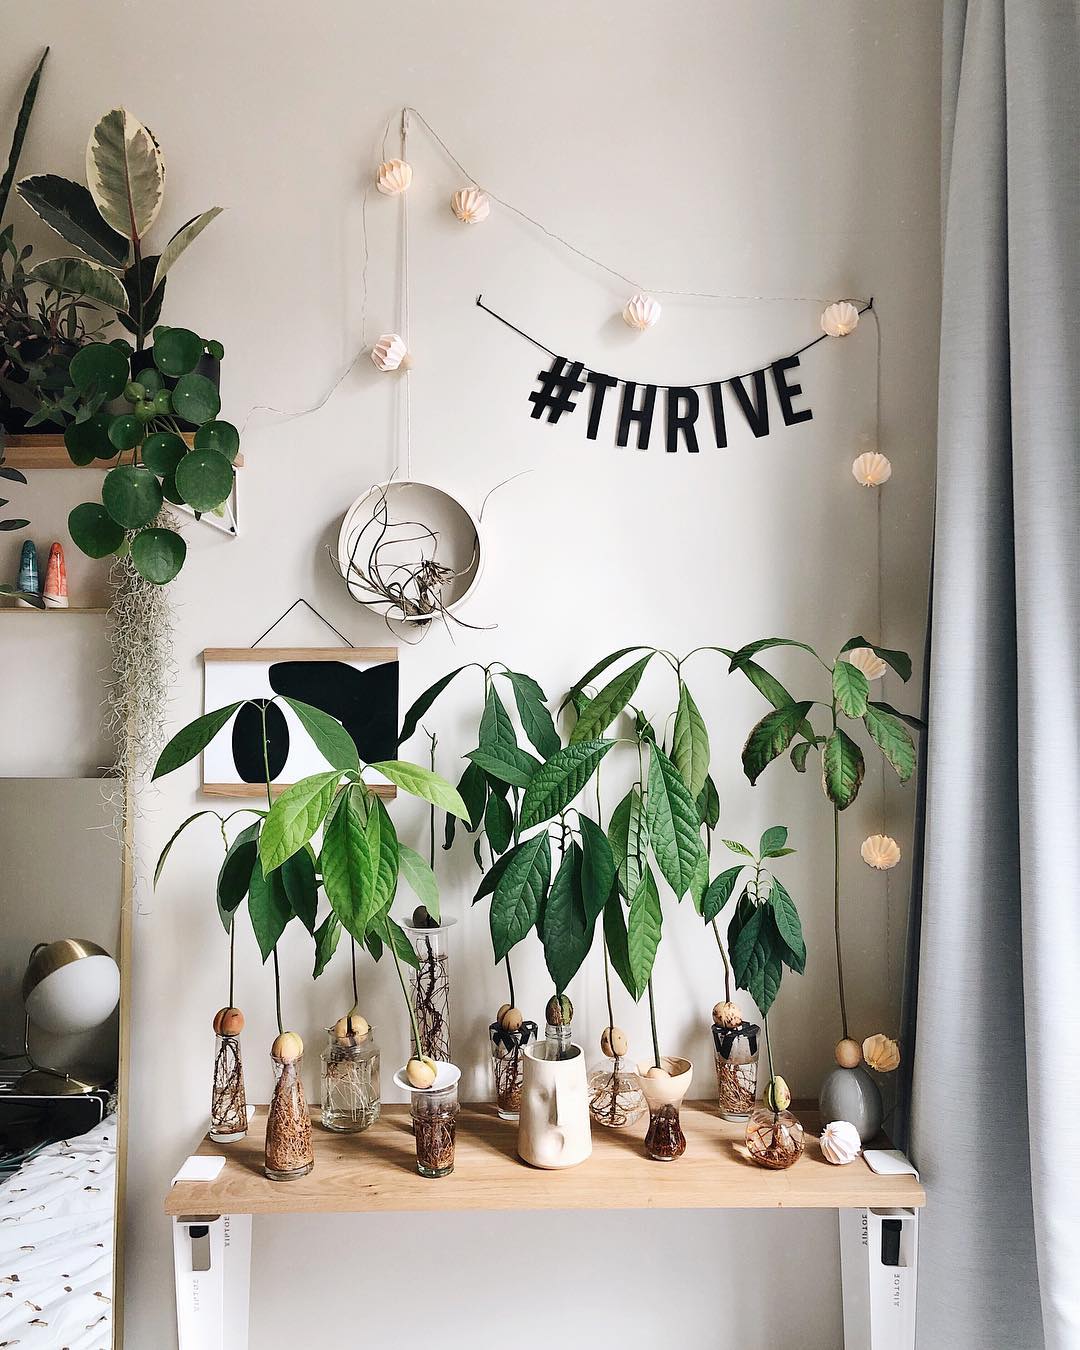
Avocado seedlings ready to be transplanted into pots
Image credit: @nelplant
Items needed: Whole avocado pit, toothpicks, a jar or cup, slow-release fertiliser, soil, a large pot, and a spot with at least 6 hours of sunlight each day.
Time taken to grow: You should be able to see the first sign of leaves in 2-8 weeks. But to test your patience and determination, it may take anywhere from 4-15 years for your tree to bear fruit.
How to grow:
- Scrub any remaining avocado flesh off the pit as it’ll cause it to turn moldy.
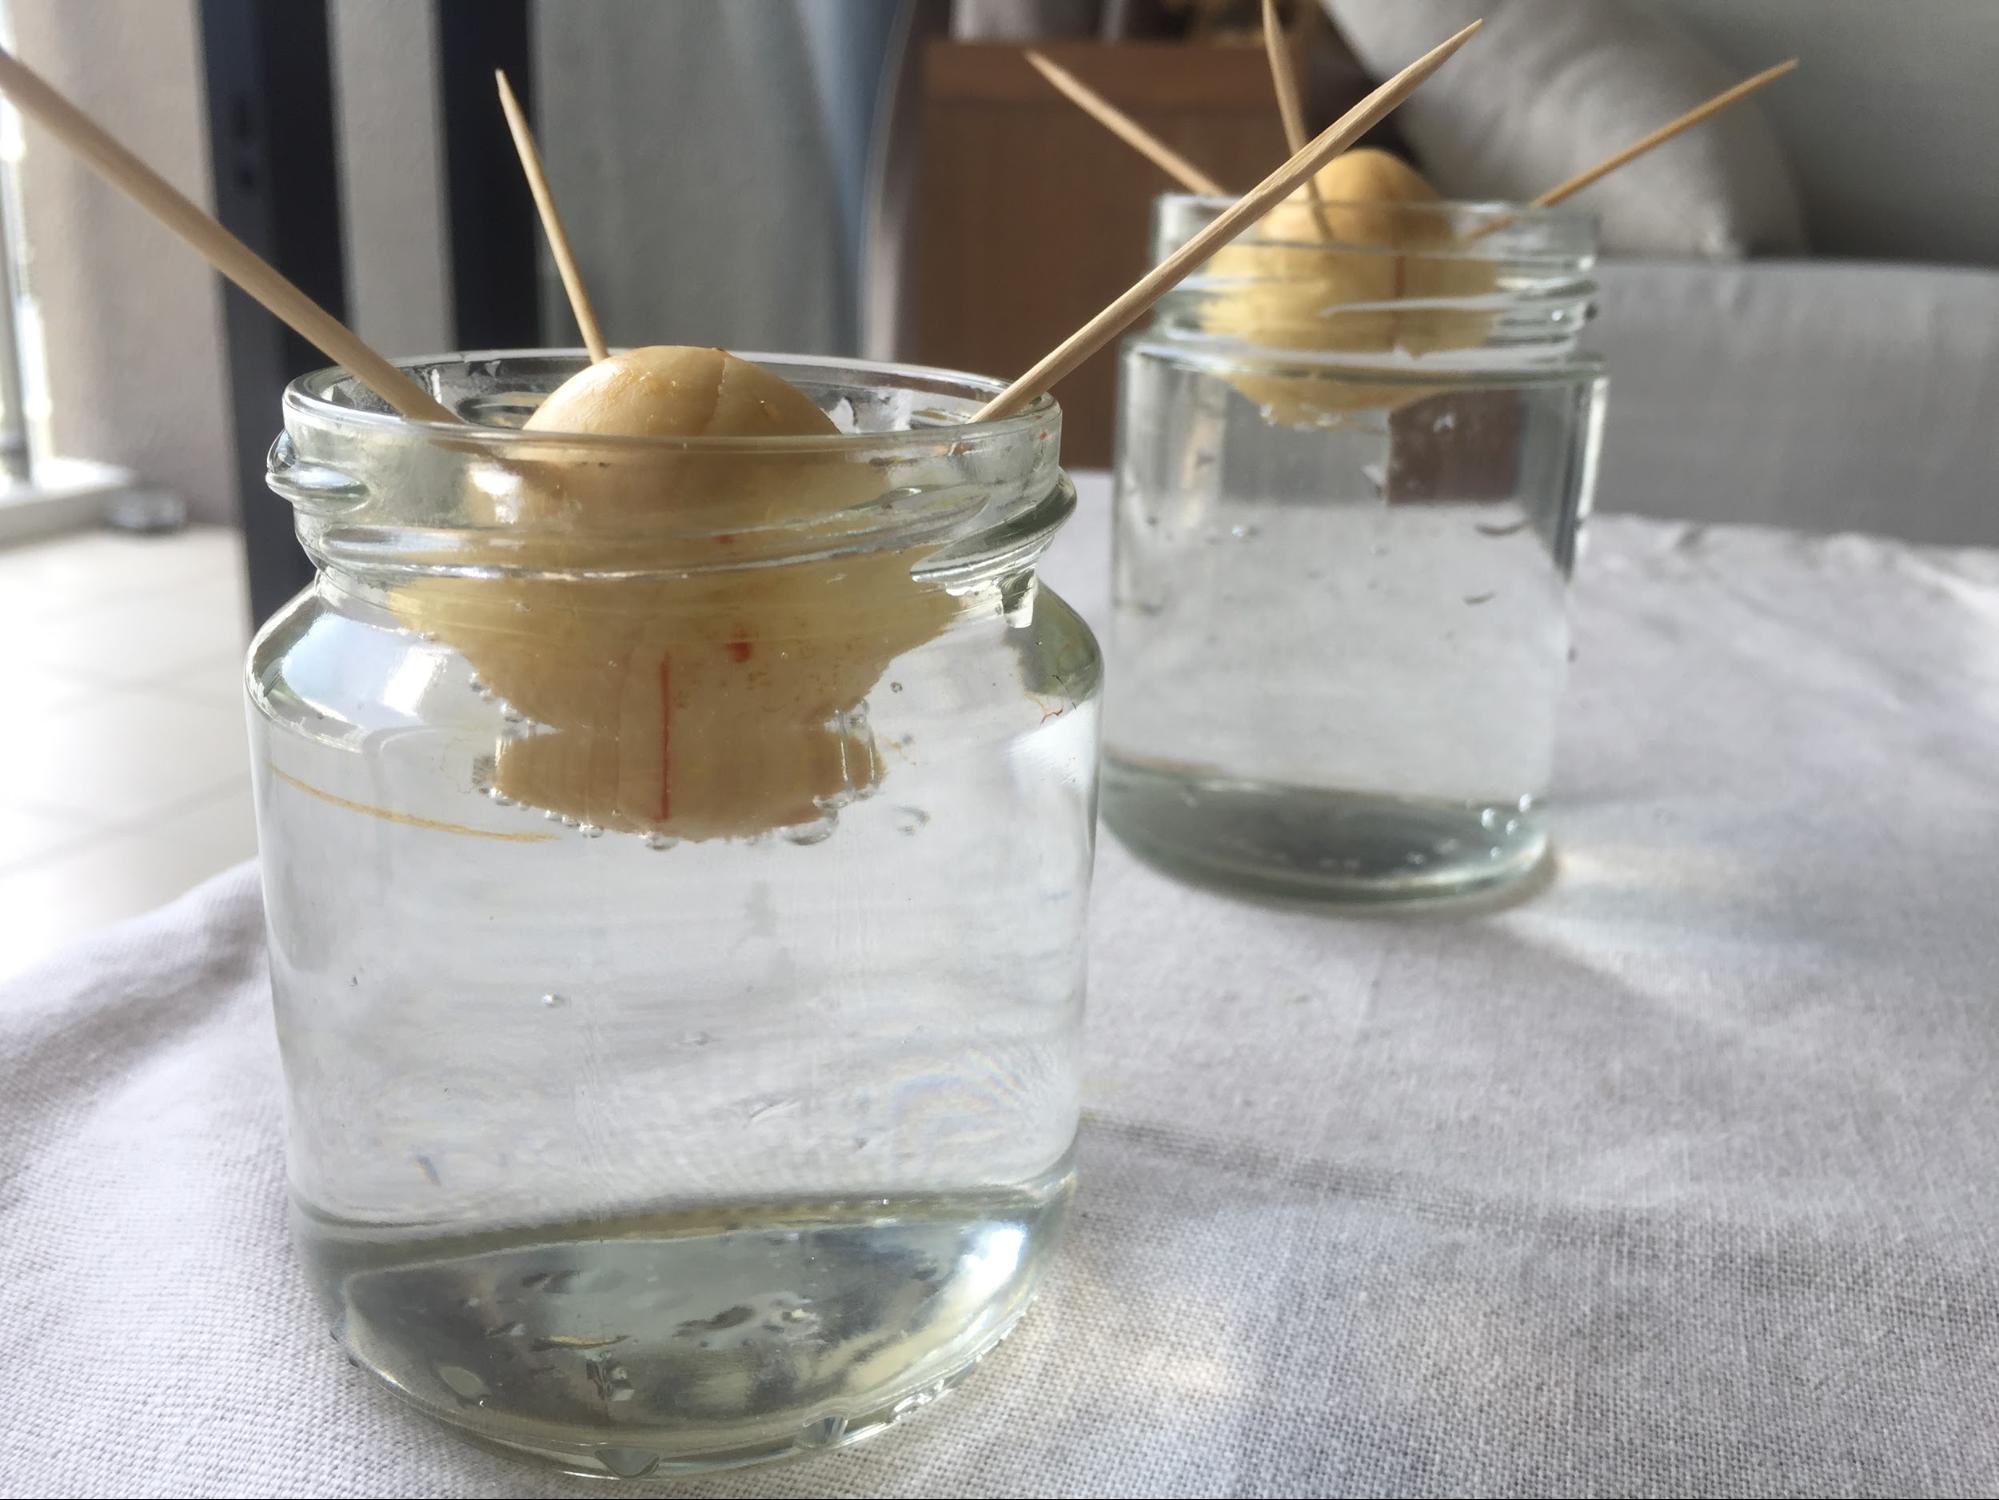 Image credit: FOOTSTEP LOG
- Poke 3 toothpicks into the pit and place it over a tall cup or a jar of water in a sunny spot, with the bottom of the pit (the non-pointy end) submerged in water.
- Change the water daily and it will take about 2-8 weeks for roots to sprout.
- Eventually, the seed will crack and you’ll see a single shoot emerge. Your avocado seedling will be able to grow in that vessel as long as there is space for its roots.
- Once the seedling reaches to about 15CM, transplant it into a large pot with soil, leaving half of the pit exposed.
- Keep the soil moist and use a slow-release fertiliser for nutrients.
- Every time the plant grows another 15CM, pluck off the top two sets of leaves to encourage growth.
7. Use plastic bottles for a vertical home garden
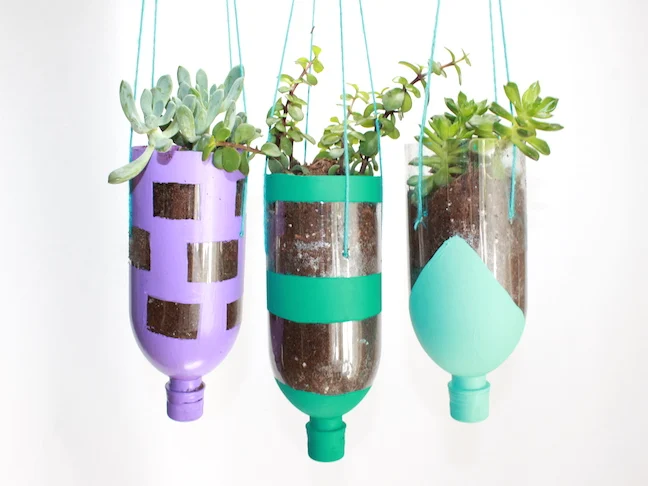
You can even paint your bottles to make them more aesthetic
Image credit: Kelly Ladd Sanchez
Instead of throwing your plastic soda bottles into the recycling bin, turn it into your next fun family activity. Adults can take care of the cutting while the young ones can paint and decorate these hanging planters for your garden. It can also help free up more space if your floor is starting to get overrun by pots.
Items needed: Plastic bottles, twine or rope, a penknife or pair of scissors, soil, and seeds or seedlings of your choice.
How to make:
- For this project, choose bottles that aren’t flimsy since they’ll have to hold up soil and your plant babies.
- Make small holes throughout the bottom or side of the bottle – depending on whether you want your planter to be horizontal or vertical, to allow excess water to flow through.
- Using a penknife or a pair of scissors, cut the bottles in half so that your plants can grow out.
- Finally, make 4 holes – 2 on each side – to string twine or rope through to hang them up.
- Fill it with soil and your chosen seeds or plants, and hang it up.
Creating a home garden
Starting an eco-friendly home garden and tending to your growing plants every day is a great way to do something productive as we #stayhomeforSG during this Circuit Breaker period. While you’re at it, use existing houseplants to decorate your workspace and bedroom to keep your spirits up and improve the air quality indoors.
As we stay home, we are playing our part to protect our loved ones and others around us. In the spirit of #SGUnited, all of us can lend a helping hand in trying times like these. After all, we can only overcome the COVID-19 situation by banding together.
But even as we stay home during this Circuit Breaker period, we can continue to remain active and engaged. If you’re itching to do more, check out the link below to lend your support to community initiatives and donate to help vulnerable groups.
Find out more on the SGUnited Portal
More things to do indoors in Singapore:
- Indoor activities to try in S’pore
- Dog-friendly cafes
- Craft workshops
- Urban farming in an HDB
- K.STAR Karaoke
This post was brought to you in support of SG United.
Cover image adapted from (L-R): @nelplant, SewCream