Growing vegetables at home
If you already have a few plants growing and want to take your gardening up a notch, try growing vegetables at home. These are staple ingredients that are great to have on hand and for most, you’ll never need to buy them from a supermarket again once you start planting them.
From ginger to baby bok choy, here are easy vegetables and herbs to grow at home from scraps that would otherwise end up in the trash:
For more gardening and plant-related articles:
- First-timer’s guide to urban gardening
- Plant nurseries in Singapore
- Boutique plant shops in Singapore
- Indoor plants that purify the air
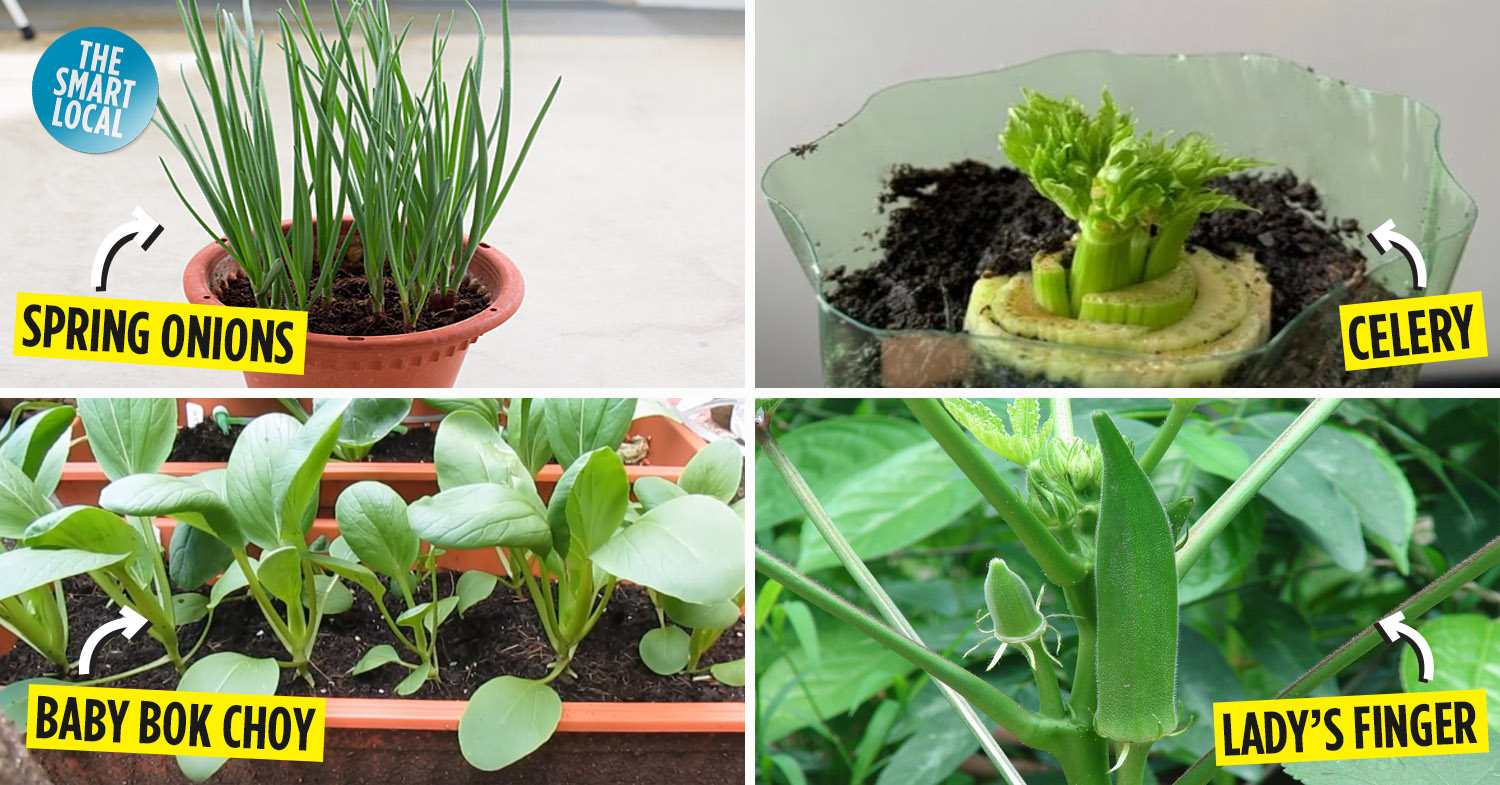
Spring onions

Image credit: Noob Cook
Spring onions are one of the easiest ways to start growing vegetables at home. Chop them up for salads, garnishes or even roast them whole for a robust side for chicken or steak. Because of how fast they grow, you’ll probably end up with enough to give away.
What you’ll need: Spring onions with roots, a bowl, a pot, soil and a spot with at least 6 hours of strong sunlight.
Time taken to grow: 5-7 days
To grow:
- Cut the end of the spring onions, leaving around 3CM from the roots.
- Place the ends in a bowl of water that should be changed daily. The water level should only be slightly above the roots.
- After a few days, you’ll see new green regrowth.
- Once the spring onion has grown to about 10CM, you can plant it in soil and ensure that it’s moist daily.
To harvest:
- Snip off however much you need and they’ll keep growing back.
Celery
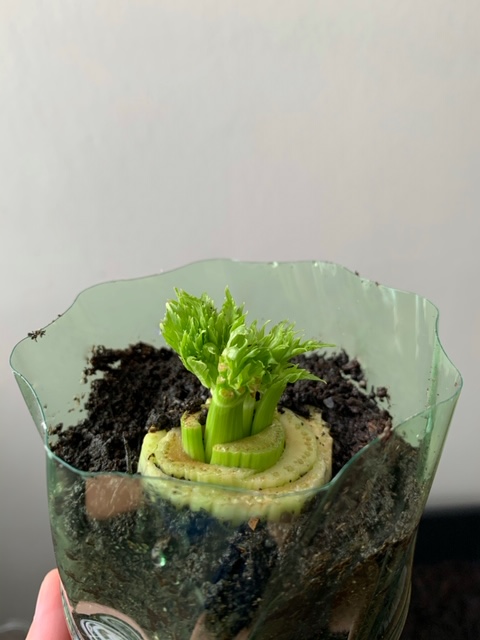
Planting new celery re-growth in soil
Image credit: Clarice Chua
When cooking with celery, people tend to just discard the ends, but you can turn the scraps into brand-new stalks which you can use in soups, juices or even just as is.
What you’ll need: Celery with the root end, a bowl, a pot, soil, slow-release fertiliser, and a sunny spot that is shady during mid-day.
Time taken to grow: About 3 months
To grow:
- Cut off the entire root base of the celery bunch, around 2CM from the bottom.
- Stick the cutting into a bowl of water. The water level should only reach ⅓ of the celery.
- Change the water everyday and replant in soil once new shoots appear in about 3-5 days.
- Plant the celery in a mix of soil and slow-release fertiliser. Only the new shoots should be above the soil.
- Water everyday and ensure soil is damp, not wet.
To harvest:
- The celery stalks should at least be 15CM in height before you harvest.
- If the outer stalks are ready before the inner ones, you can pluck those off first.
- If the whole plant is ready, take the simpler route by uprooting the whole thing before starting the process again for a new plant.
Garlic
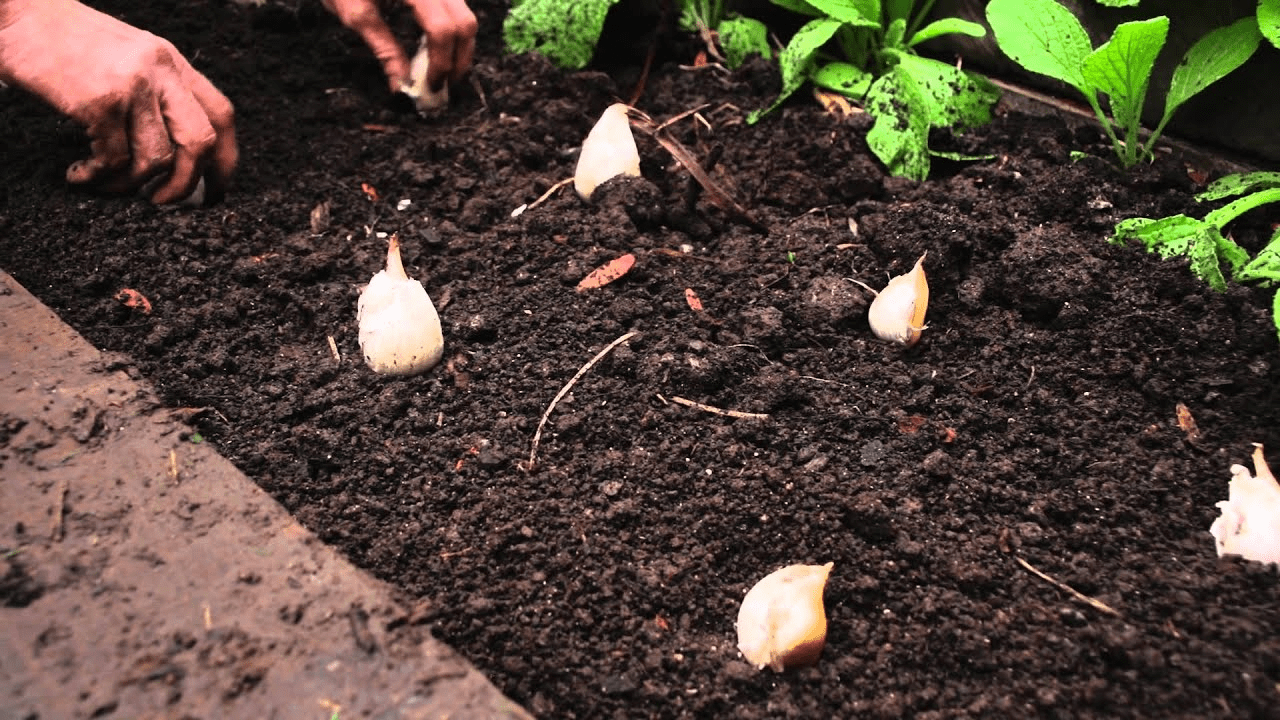
Plant pointy-side up
Image credit: podgardening
A staple in all households, garlic is versatile and used in many different cuisines. Besides using it in stir-fries, make your own garlic butter and garlic oil to flavour dishes with. All you need to get started is a single clove.
Pro tip: Use fatter cloves as it will result in larger bulbs growing.
What you’ll need: One or a few cloves of garlic, a pot, soil, slow-release fertiliser, and a spot with at least 6 hours of strong sunlight.
Time taken to grow: 6 months
To grow:
- Plant garlic cloves pointed-end up and blunt-end down in soil.
- Water daily, ensuring soil is moist. Fertilise when leaves start to grow.
- When stalks start to grow, cut them off to ensure that the nutrients go to the growing bulb.
- When the plant stops producing leaves, stop watering as the dry soil will help the bulbs last longer after harvest.
To harvest:
- Harvest when the leaves turn brown.
- Dig bulbs up and leave to dry for 2-3 weeks.
Ginger

Ginger with buds cut into small pieces for planting
Image credit: Clifford Manthey
You’ve probably heard your mum or grandma say that ginger is a “warm” food. What this means is that it can help to revitalise, reduce bloating and fight colds. Make comforting ginger tea or steam fish with ginger, soy sauce and sesame oil for an easy dinner protein.
What you’ll need: A ginger with a few budding eyes, a bowl, a pot, soil, slow-release fertiliser, an area with filtered sunlight.
Time taken to grow: 8-10 months
To grow:
- Soak the ginger in a bowl of water overnight to remove any growth inhibitors that may have been sprayed on it.
- Cut the ginger into about 2CM pieces with 1-2 eyes on each. Each piece of ginger will produce one plant.
- Plant the pieces bud-side up in a mixture of soil and slow-release fertiliser and water daily, ensuring soil is moist.
To harvest:
- When the leaves start to die down, it’s time to harvest and you can pull up the whole plant.
- The best part is that after harvesting, you can immediately replant new ginger with buds to have a continuous supply.
Lady’s Finger

Image credit: Nature Bring
Lady’s finger is a subjective veggie – you either hate it or love it. Well, for those who want more of it, you can actually grow your own at home. Also known as okra, this hardy vegetable goes well with strong flavours like curries and sambal since it’s quite bland on its own.
What you’ll need: Lady’s finger seeds, a wide pot at least 25CM deep, soil, slow-release fertiliser, a spot with 5-6 hours of direct sunlight.
Time taken to germinate: 4-5 days
Time taken to grow: 55-65 days
To grow:
- Plant seeds in soil mixed with slow-release fertiliser and water daily to keep soil moist.
- Flowers should start growing in 30-35 days and fruit will start to bear after 3-5 more days.
To harvest:
- Harvest when the lady’s fingers are still tender, if not they’ll become too fibrous. A good estimation is when they grow to about 7-12CM long.
Kailan

Image credit: Fusian Living
We’re all super familiar with this dark green leafy vegetable – almost all zi char places have a stir-fried kailan dish on their menu.
What you’ll need: Kailan seeds, a pot, soil, slow-release fertiliser, and a spot with 5-6 hours of strong sunlight.
Time taken to germinate: 10-15 days
Time taken to grow: 60-70 days
To grow:
- Plant the seeds in soil and water daily, ensuring soil is moist.
- Fertilise after 10 days when seedlings are stronger.
To harvest:
- Harvest young stems and leaves when the first flowers appear.
- Cut off what you need at the stem and if your plant has adequate nutrients, it will keep producing leaves enough for 2-3 more harvests.
Baby Bok Choy
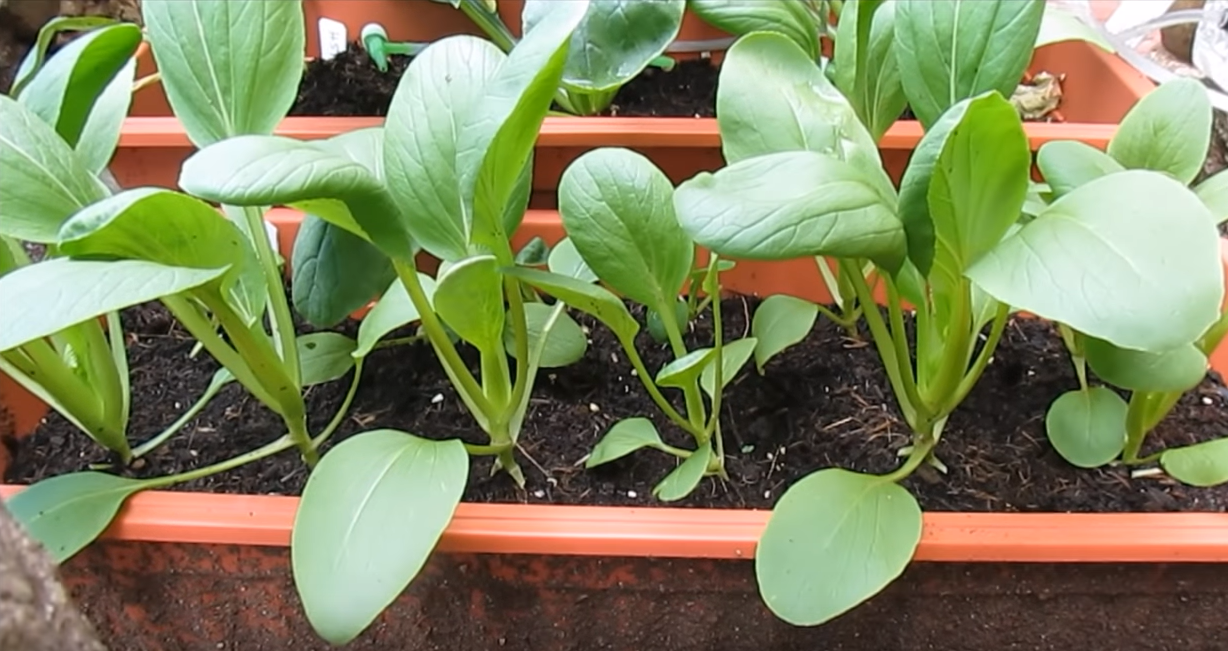
Baby bok choy at around 30 days
Image credit: VeronicaFlavor
Smaller and sweeter than regular bok choy, baby bok choy is an easy vegetable to grow at home.
What you’ll need: baby bok choy seeds, a pot, soil, slow-release fertiliser, a spot with at least 6 hours of sunlight
Time taken to germinate: about 5-7 days
Time taken to harvest: 40-45 days
To grow:
- Plant seeds in a mixture of soil and slow-release fertiliser. Water daily to ensure soil is moist.
To harvest:
- Harvest when the baby bok choy is about 15CM tall.
- Cut the plant off, leaving about 2CM at the soil line, this should ensure re-sprouting and at least another harvest.
Lemongrass
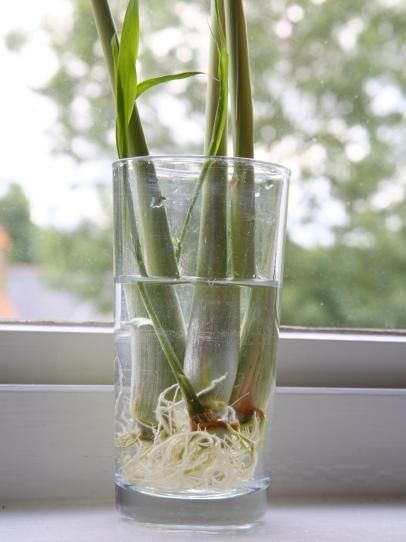
Image credit: HGTV
A refreshing scent that’s almost zingy, there’s no other substitute for lemongrass. Make lemongrass tea, flavoured syrup for desserts, or flavour tom yam soup with it.
What you’ll need: lemongrass stalks, a jar, a pot, slow-release fertiliser, and a spot with at least 5 hours of sunlight.
Time taken to grow: 4-6 months
To grow:
- Cut about 2-3CM off the tops of the lemongrass and place the stalks in a jar of water for about 2 weeks. Change water daily.
- When roots start to appear stronger, plant the stalks in a mixture of soil and slow-release fertiliser. Water daily to ensure soil is moist.
To harvest:
- Harvest when the stalk reaches around 30CM and don’t uproot the plant, just cut off what you need.
Try growing vegetables at home
Growing vegetables at home to cook brings a whole ‘nother level of satisfaction than buying store-bought. Not only can you save money if growing from scraps, but you also don’t have to worry about pesticides as well.
Cover image adapted from (clockwise from top-left): Noob Cook, Clarice Chua, Nature Bring, VeronicaFlavor
Originally published on 13h April 2020. Last updated by Ra Krishnan on 20th May 2021.